So, you’re wondering about how well seals keep things tight between casing and covers. It sounds simple, right? Just slap a seal in there and call it a day. But it’s a bit more involved than that. We’re talking about making sure water, or whatever else, stays exactly where it’s supposed to. This involves looking at the bits and pieces, the stuff they’re made of, and how you put it all together. Let’s break down how seals really do their job to make sure everything fits snugly and stays that way.
Key Takeaways
- To get a good seal, you need to establish a clear, unbroken line where the seal will happen. Any gaps here mean trouble.
- Seals work by deflecting, or squishing, to fill in any small imperfections or movements between the casing and cover.
- You have to plan for things not being perfect. Tolerances, warping, and even temperature changes can affect the fit, and the seal needs to handle that.
- The materials used for seals and the surfaces they touch matter a lot. They need to work together and resist the environment.
- Putting it all together right is key. Whether it’s steel, concrete, or plastic, the way you join casing sections needs to support a watertight seal.
Understanding The Fundamentals Of Sealing
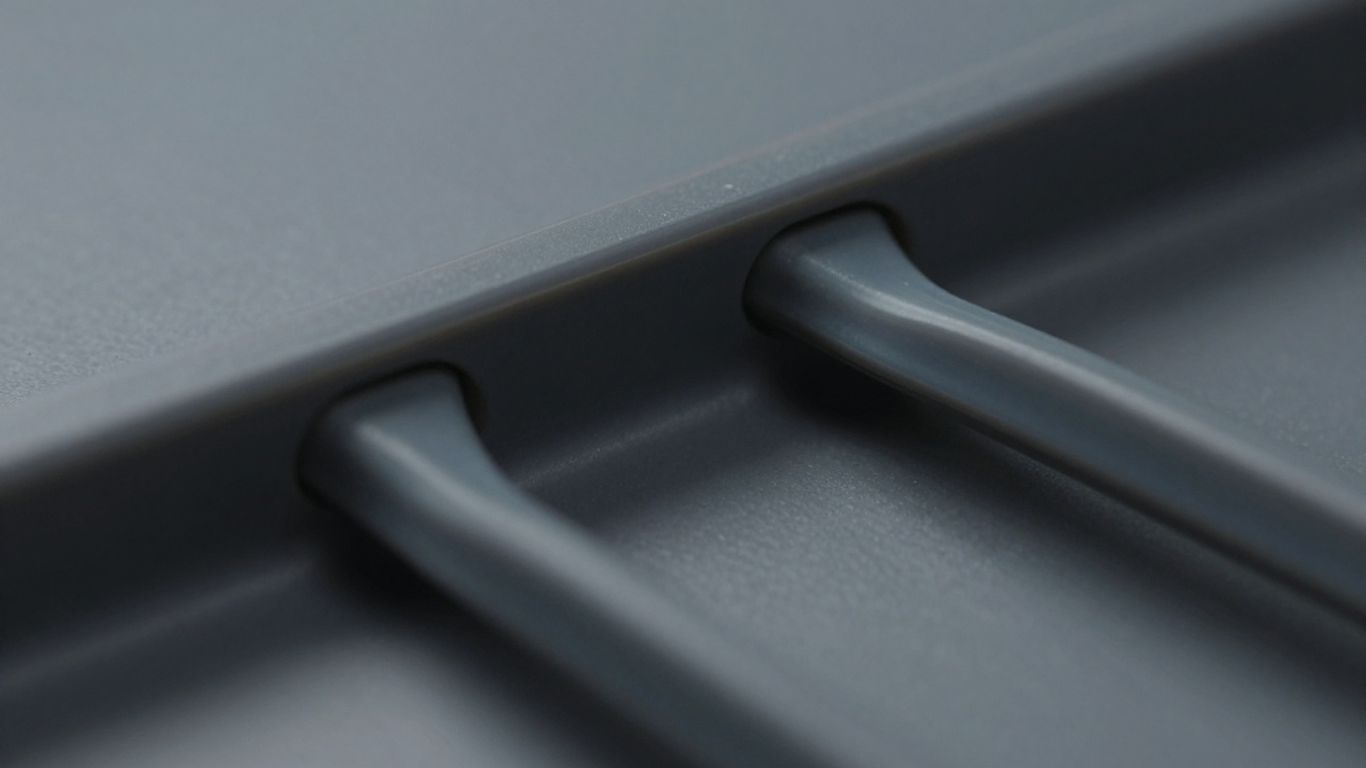
Establishing The Continuous Sealing Line
When you’re putting together something that needs to be watertight, like a casing for electronics or a pipe joint, the first thing to think about is the path the water can’t take. Imagine drawing a line where the two parts meet – that’s the line the seal has to cover completely. If there’s even a tiny break in this line, water can sneak through. It sounds simple, but it’s surprisingly easy to mess up, especially in early designs. Every time you have to lift your pen to trace the path where the seal needs to be, that’s a potential spot for leaks. The seal must form an unbroken barrier.
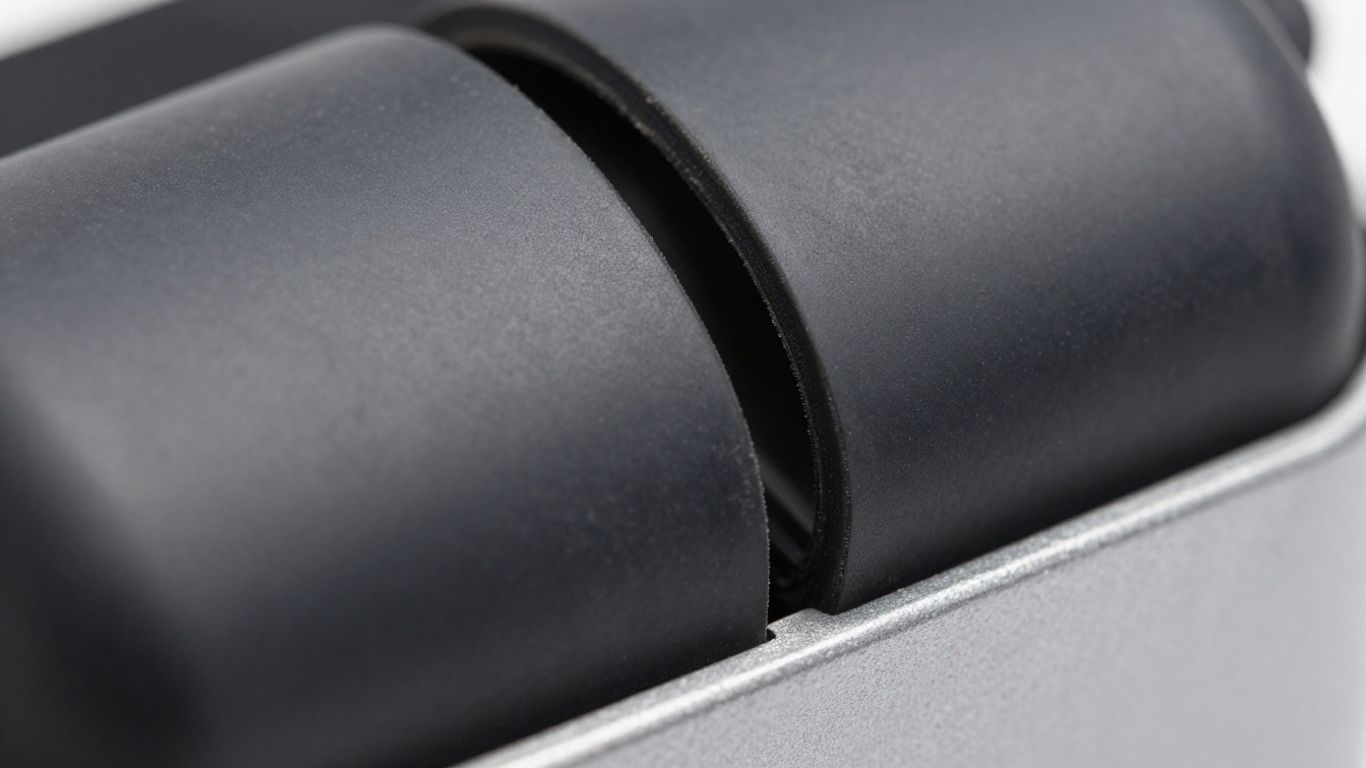
The Critical Role Of Seal Deflection
Now, parts aren’t always perfectly shaped, and they can move around a bit due to pressure or temperature changes. That’s where seal deflection comes in. Think of it like a cushion. The seal needs to be squishy enough to fill in any small gaps or unevenness between the parts. This extra give, or compression, is what makes sure the seal stays in contact and keeps that continuous line intact, even when things aren’t perfectly aligned. It’s not just about having a soft material; it’s about having the right amount of squeeze to compensate for imperfections.
Accounting For Component Uncertainties
Designing a seal means anticipating all the ways things can go wrong with the parts themselves. We have to consider:
- Tolerances: Parts are never made exactly to spec; there are always small variations.
- Distortion: Pressure, like water pressure or the force of tightening bolts, can actually bend or warp the parts.
- Surface Roughness: Even smooth-looking surfaces have tiny bumps and valleys.
- Thermal Expansion: Materials expand when they get hot and shrink when they get cold, changing the gap.
All these factors can create tiny openings. The seal needs to be designed with enough ‘extra’ deflection – more than what’s strictly needed for the ideal situation – to handle the worst-case scenario where all these uncertainties happen at once. This margin of extra squeeze is what really makes a seal reliable.
Material Properties And Seal Integrity
When we talk about making sure a casing and its cover fit together snugly, the materials used for the seals play a pretty big role. It’s not just about having a piece of rubber or plastic in there; it’s about how that material behaves and interacts with the parts it’s supposed to seal.
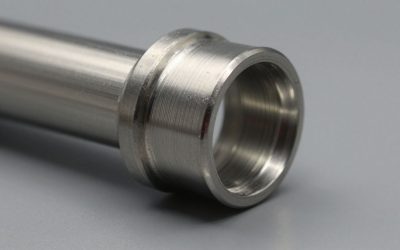
Surface Finish Requirements For Housing Bores
The surface where the seal sits, often called the housing bore, needs to be just right. If it’s too rough, tiny imperfections can create little pathways for leaks, even with a good seal. Think of it like trying to get a perfect seal on a piece of wood with lots of splinters – it’s just not going to happen. We’re talking about surface roughness, but also things like nicks or scratches that can happen during manufacturing or assembly. These flaws can break the continuous line the seal needs to maintain.
Seal Tolerances For Optimal Fit
Just like the housing, the seal itself has to be made within certain tolerances. This means its dimensions – like its thickness or diameter – can’t vary too much from what’s specified. If a seal is too small, it won’t have enough contact pressure. If it’s too big, it might get squashed too much, which can damage it or prevent it from sealing properly. Getting these tolerances right is key to ensuring the seal can do its job effectively.
Material Resistance To Environmental Factors
Finally, the seal material has to stand up to whatever conditions it’s going to face. This could mean resisting chemicals, extreme temperatures, or even just UV light if it’s exposed to the sun. A seal that degrades or breaks down quickly won’t keep a tight fit for long. Different applications will need different materials, so picking the right one based on its resistance properties is a big deal.
Here’s a quick look at some common seal materials and their general resistance:
| Material | Temperature Range (°C) | Chemical Resistance | Notes |
|---|---|---|---|
| Nitrile (NBR) | -40 to 120 | Good (oils, fuels) | Common, cost-effective |
| EPDM | -50 to 150 | Excellent (water, steam, ozone) | Good for outdoor applications |
| Silicone (VMQ) | -60 to 230 | Very Good (wide temp range) | Can be less durable against abrasion |
| Viton (FKM) | -20 to 200 | Excellent (chemicals, fuels) | Higher cost, good for harsh environments |
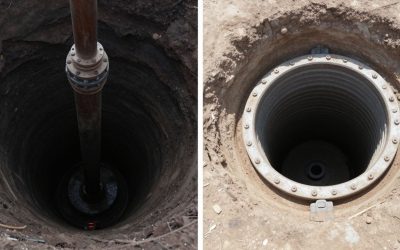
Joining Casing Sections For Watertightness
Putting together casing sections so they don’t leak is a pretty big deal, especially when you need things to be watertight. It’s not just about making them fit; it’s about making them stay that way, no matter what.
Methods For Steel Casing Joints
For steel casing, you’ve got a few main ways to connect sections. Welding is a common one. You can butt weld sections together or use a weld ring. The key here is doing it right, often with multiple passes, to make sure the joint is as strong, if not stronger, than the casing itself. It takes skill and the right equipment, and you have to be careful about potential corrosion near the weld. Another method is using threaded connections. This is faster and doesn’t involve heat, which is good for safety, especially if there might be gases around. However, threaded joints can weaken the overall strength of the casing string, and you need to make sure the threads match up perfectly between different manufacturers, or you’ll end up with leaks.
Techniques For Concrete Casing Joints
Concrete casing often uses a bell-and-spigot design, similar to what you see with some plastic pipes. You’ll typically use a mastic sealant, often made from butyl rubber, that’s approved for drinking water. The joint needs to be designed according to specific standards, like ASTM C990, which talks about using preformed flexible joint sealants. It’s important that the sealant stays flexible and waterproof. Sometimes, after joining, a bit of sand and cement mix is added around the outside for extra security.
Joining Plastic And Fibreglass Casing
Plastic casing, like PVC or ABS, has several options. You can go with threaded joints, similar to steel, but you need to be careful about compatibility between brands. Using O-rings on threads or tapered seals can help. For a really secure, solvent-free connection, PVC O-ring joints are a good choice. If you’re using solvents, make sure the primer and glue are approved for potable water. Fibreglass casing usually uses a male-and-female, or bell-and-spigot, system. These sections are often screwed together and then sealed with an epoxy that won’t affect the water quality. The goal with all these plastic and fibreglass methods is a flush joint that doesn’t create any snags or uneven surfaces inside or out.
Here’s a quick look at some common methods:
- Steel: Welding (strong but complex), Threaded (easy but can weaken joint).
- Concrete: Bell-and-spigot with mastic sealant (requires specific standards).
- Plastic (PVC/ABS): Threaded (check compatibility), O-ring (solvent-free), Solvent-welded (use approved materials).
- Fibreglass: Bell-and-spigot with screws and epoxy (ensure epoxy is safe for water).
When joining casing sections, the primary concern is always creating a permanent, watertight seal. Any material used in the process must not contaminate the water it will eventually hold. Following manufacturer guidelines and relevant industry standards is key to a reliable connection.
Ensuring A Permanent And Watertight Bond
Getting casing sections to stick together so water can’t sneak through is a big deal, especially when you’re dealing with things like water pipes or wells. It’s not just about making them touch; it’s about creating a seal that lasts and keeps the water where it’s supposed to be. This means picking the right materials and putting them together in a way that accounts for all sorts of little imperfections.
Approved Sealing Materials For Potable Water
When water is meant for drinking, the materials you use to seal joints really matter. You can’t just use anything. For concrete pipes, for example, a common choice is a mastic sealant, often made from butyl rubber. The key is that it has to be approved for contact with drinking water. This usually means it meets standards like NSF International Standard 61. This standard checks that the material won’t leach anything harmful into the water. For plastic pipes like PVC, you might use special primers and glues, or O-rings, that are also certified safe for potable water. It’s all about making sure the water stays clean and safe.
Best Practices For Casing Joint Design
How you design the joint itself plays a huge role. For steel casings, you might see threaded joints or welded joints. Welded joints often involve multiple passes to build up a strong, watertight connection. For concrete, the bell-and-spigot method is common, where one end of a pipe fits into the flared end of another. A flexible joint sealant is then used to fill the gap. Plastic pipes can have various joint types, including threaded or plain ends that are joined with adhesives or O-rings. The goal is always to create a continuous, unbroken line where the seal can work effectively. Avoiding complex geometries that are hard to seal is also a good idea.
Verification Methods For Seal Performance
So, how do you know if your seal is actually going to work and keep working? You need ways to check. For critical applications, pressure testing is a common method. You apply pressure to the system and check for any leaks. Visual inspection is also important – looking for any signs of sealant failure or gaps. Sometimes, you might use tracer dyes or even specialized equipment to detect very small leaks. For long-term performance, especially in buried applications, you might rely on the reputation of the materials used and the installer’s adherence to best practices, as direct re-inspection can be difficult or impossible.
The trick to a good seal isn’t just about the seal itself, but how the parts it sits between are made and fit together. Even the best seal can fail if the surfaces it contacts are rough or uneven, or if the parts distort under pressure. Thinking about the whole picture, from the material of the casing to how it’s assembled, is what makes a bond truly watertight and permanent.
Addressing Challenges In Seal Design
Managing Distortion And Thermal Expansion
When you’re putting together casing sections, things rarely stay perfectly still. Components can warp a bit, especially when they’re under pressure or just from the manufacturing process itself. Then there’s temperature to think about. Metal expands when it’s hot and shrinks when it’s cold, and plastics can do the same. All this movement can mess with the seal. If the parts move apart, you get a gap, and leaks happen. If they move too close, the seal can get squashed too much, which also causes problems. The trick is to design the seal so it can handle these changes without failing. You need to figure out how much the parts might move and make sure the seal has enough give, or ‘deflection,’ to keep things sealed up no matter what.
The Impact Of Surface Roughness And Flaws
Even if your casing parts are perfectly shaped, the surfaces where the seal sits might not be smooth as glass. Manufacturing processes can leave tiny ridges, scratches, or other imperfections. These little flaws can create pathways for fluids to sneak through. Think of it like trying to seal a leaky faucet with a rough washer – it just won’t hold. The seal material has to be able to fill in these tiny gaps and irregularities. Sometimes, you might need a softer seal material or a more precise surface finish on the casing itself to get a good seal. It’s a balancing act between the seal’s ability to conform and the surface quality of the parts it’s sealing against.
Avoiding Over-Compression Of Seal Materials
It might seem like more compression equals a better seal, but that’s not always true. If you squeeze a seal too hard, you can actually damage it. This is especially true for rubber or plastic seals. Over-compression can force the material out of its intended space, weaken it, or even cause it to tear. When a seal is over-compressed, it loses its ability to spring back and adapt to future movements or temperature changes. This means a seal that was initially tight might start leaking later on. It’s important to calculate the right amount of compression needed – not too much, not too little – to maintain a reliable seal over time. A good rule of thumb is to aim for a specific percentage of compression, typically between 15-30%, depending on the seal type and application, but always check the manufacturer’s recommendations.
Here’s a quick look at factors affecting seal performance:
| Factor | Impact on Seal |
|---|---|
| Thermal Expansion | Can increase or decrease gap, stressing the seal |
| Component Warping | Creates uneven gaps along the seal line |
| Surface Roughness | Allows fluid to bypass the seal |
| Over-Compression | Damages seal material, reduces lifespan |
| Under-Compression | Leaves gaps, leading to leaks |
| Material Incompatibility | Seal degrades, losing sealing ability |
Wrapping It Up
So, when you get down to it, making sure a seal fits just right between a casing and its cover isn’t some kind of dark art. It’s about understanding the little imperfections that happen when parts are made and dealing with them. Designers figure out how much things might move or warp, and then they pick or make a seal that can handle it all, with a bit of extra give just in case. It’s a careful balancing act, making sure the seal does its job without getting squashed too much. It’s all about planning for those tiny gaps and making sure the seal can fill them, keeping everything tight and secure.
Frequently Asked Questions
What is the main goal of a seal between a casing and a cover?
The main goal is to create a tight, leak-proof barrier. This seal stops anything, like water or dirt, from getting in or out where the casing and cover meet. Think of it like a rubber band around a jar lid – it keeps the contents fresh and prevents spills.
Why is seal deflection important?
Seals need to be a bit flexible, or ‘deflect,’ to work properly. This flexibility allows the seal to squish into tiny gaps and uneven spots on the casing and cover. It’s this squishiness that helps close up any potential leaks and ensures a continuous seal, even if the parts aren’t perfectly smooth.
What can cause gaps or leaks in a seal?
Several things can cause problems. The parts might not be perfectly shaped due to manufacturing limits (called tolerances). They can also bend or warp a little from pressure or temperature changes. Even tiny scratches or rough spots on the surface can create openings that a seal needs to cover.
Does using a stronger or harder seal material always make a better seal?
Not necessarily. While strong materials are important, seals need to be able to ‘deflect’ or squish to fill gaps. A seal that’s too hard might not compress enough to seal tiny imperfections. The right material needs to be tough enough but also flexible enough for the specific job.
What are some common ways to join casing sections to keep them watertight?
It depends on the material. Steel casings are often welded together. Concrete casings usually use a special, flexible, waterproof sealant between sections, like butyl rubber, and might get extra sealing on the outside. Plastic casings can be glued, threaded, or use rubber O-rings, depending on the type.
How do you make sure a seal will work long-term?
Engineers figure out all the ways the parts might move or have imperfections. Then, they design the seal to be flexible enough to handle all those issues combined, plus a little extra. They also make sure the seal isn’t squeezed too much, which could damage it or make it less effective over time. Testing is also key to confirm it works.