When you’re setting up a well, whether it’s for your home or something bigger, you’ve got to think about how you’re going to seal it up. It’s not just about getting water; it’s about keeping that water clean. The depth of your well really changes how you’ll do this. We’re going to look at How Well Seals Work in Deep vs Shallow Wells and what makes them different. It might seem like a small detail, but getting the seal right is super important for the long run.
Key Takeaways
- The depth of your well is the main thing that decides how you seal it. Deep wells need different methods than shallow ones to keep contaminants out.
- For shallow wells, a simpler seal might work, often going down to the first solid layer or at least 20 feet. For deeper wells, you need to make sure the seal goes all the way down properly.
- Material choice matters. Cast iron and ABS plastic are common for shallower setups, but steel or stainless steel are better for the tougher conditions in deep wells.
- How you put the sealing material in is different too. Shallow wells might get a simple pour, but deep wells usually need a special pipe, like a tremie, to fill the space from the bottom up.
- A good seal prevents dirty surface water from getting into your well. This is true whether your well is just a few feet deep or hundreds of feet down.
Understanding Well Seal Depths
When you’re setting up a well, figuring out how deep the seal needs to go is a pretty big deal. It’s not just about sticking something in the ground; it’s about making sure your water stays clean and safe. The depth of your well seal directly impacts its ability to keep out unwanted stuff from the surface. Think of it like putting a lid on a jar – you want it to fit snugly all the way around.
The Importance of Seal Depth
Why all the fuss about depth? Well, surface water, and even shallow groundwater, can carry all sorts of contaminants. We’re talking about things like pesticides, animal waste, or just general dirt and debris. If your seal isn’t deep enough, these things can easily seep down into your well casing and mess up your water supply. It’s like having a leaky roof; a small problem can quickly turn into a big one.
Extending Seals to Impermeable Layers
Ideally, you want to extend your well seal down to the first impermeable layer you hit. This is usually a layer of solid rock or dense clay that water can’t easily pass through. Once you reach this layer, you’ve got a natural barrier. If you don’t find such a layer before you hit your water source, the seal should go down to the top of your gravel pack. This creates a solid barrier that prevents surface water from migrating down the outside of your well casing.
Minimum Seal Depth Recommendations
So, how deep is deep enough? While it can vary based on your specific location and geology, a common recommendation is to aim for a minimum seal depth of at least 20 feet (about 6 meters). This depth usually gets you below the most active surface water and shallow groundwater zones. It’s a good rule of thumb to follow, but always check with local regulations or a professional well driller if you’re unsure.
Here’s a quick rundown of what to consider:
- Target Depth: Extend the seal to the first impermeable layer.
- No Impermeable Layer: Seal down to the top of the gravel pack.
- Minimum Depth: Aim for at least 20 feet (6 meters).
- Borehole vs. Casing: Make sure there’s a gap between the borehole wall and the casing for the seal material.
The space between your well casing and the borehole wall is where the sealing material goes. This gap needs to be wide enough to allow for proper placement of grout or bentonite, creating a continuous barrier. If the gap is too small, you might end up with voids where contaminants can still find a way in.
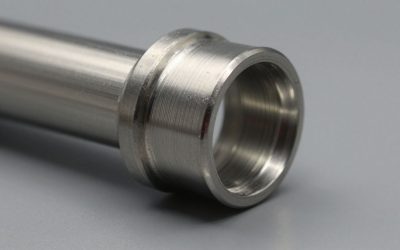
Material Selection for Well Seals
Picking the right stuff for your well seal really matters, especially when you’re thinking about how deep that well goes. It’s not just about grabbing whatever looks sturdy; the material has a big impact on how long it lasts and how well it does its job.
Cast Iron Seals and Their Limitations
Cast iron was the go-to for a long time, and honestly, it’s still around for a lot of jobs. It’s pretty affordable and can be shaped into different designs, which is handy. For wells that aren’t too deep, maybe up to around 300 feet, cast iron seals can work just fine. They’re often available in split designs, making installation a bit easier.
But, here’s the catch: cast iron doesn’t play well with rust. Over time, it can start to corrode, and that’s not good for a seal. Plus, if you’re not careful during installation, it can actually crack. This makes it less than ideal for really deep wells or situations where you need top-notch durability.
Advantages of ABS Plastic Seals
ABS plastic seals have really gained traction, and for good reason. They’re often more budget-friendly than cast iron these days. They don’t rust or corrode, which is a huge plus for longevity. You can get them in both solid and split designs, so they’re pretty versatile for most common setups.
They’re a solid choice for many typical installations, and you can even get them with stainless steel hardware if you need a little extra toughness. However, just like cast iron, they aren’t the best bet for those super deep wells, generally not recommended for depths beyond 300 feet.
Steel and Stainless Steel for Deep Wells
When you’re dealing with wells that go deeper than 300 feet, and the pump might be set way down there, like 1200 feet or more, steel seals are usually the way to go. These are built tough, often made from solid steel plates, giving them a lot of strength. They can handle bigger casing sizes too, up to 12 inches.
Steel seals are significantly stronger than their cast iron or ABS cousins. The trade-off is that they can be pricier, and sometimes the smaller sizes might have a thinner top plate compared to other materials. If corrosion is a major concern, stainless steel takes it up a notch. It offers the same strength as regular steel but with superior resistance to rust and other corrosive elements. It’s the premium choice for extreme conditions, though it comes with the highest cost.
Grouting Techniques for Well Integrity
Alright, so we’ve talked about seals and their depths, but how do we actually get them in there and make sure they do their job? That’s where grouting comes in. Think of it as the mortar that holds your well’s protective barrier together. Getting this part right is super important for keeping your water clean and your well working well for a long time.
Simple Grouting for Shallow Wells
For those shallower wells, the approach can be pretty straightforward. Sometimes, you’ll see folks just pour something like bentonite chips or a simple cement mix directly into the space between the casing and the borehole wall. It’s quick, it’s easy, and for shallow depths, it can get the job done. This method is often called the "dump and pour" or "just dump the cement in there" approach. It works best when you’re dealing with shallow aquifers, maybe only 40 feet deep or so. The idea is that the material fills the gap and, in the case of bentonite, swells up to create a seal. However, it’s not always perfect. There’s no guarantee you’ll get a complete seal all the way around, especially if there’s a lot of water present, which can make the grout settle unevenly.
Tremie Pipe Method for Deeper Wells
When you’re going deeper, things get a bit more involved. The go-to method for most professionals is using a tremie pipe. This is basically a long, narrow pipe that you lower down into the space between the casing and the borehole (the annulus). You then pump your grout mixture down through this pipe, starting from the very bottom and slowly pulling the pipe up as the grout fills the space. This bottom-up approach is key because it makes sure there are no air pockets or gaps left behind. It’s the most reliable way to get a solid, continuous seal from the bottom of the grouted section all the way to the top. You have to be careful while pulling the pipe out, though – you need to keep the end of the pipe submerged in fresh grout the whole time to avoid creating voids.
Advanced Grouting Methods
While the tremie pipe is pretty standard, there are even more advanced techniques for really deep or complex wells. One method, sometimes called the "Halliburton method" (though it’s not exclusive to them), involves pumping grout down inside the well casing and then letting it flow out into the annular space from the bottom. This requires more specialized equipment and is usually seen on larger municipal or commercial projects. It’s a bit more involved than the tremie method but can be specified by engineers for certain situations. The main goal, no matter the method, is to create a solid barrier that stops unwanted water from getting into your well.
Grouting isn’t just about filling a space; it’s about creating a barrier. This barrier prevents surface water, or water from undesirable underground layers, from mixing with the water you intend to draw from your aquifer. A good grout job isolates your water source and protects its quality. It’s a critical step that many people overlook, but it has a huge impact on the long-term health and safety of your well.
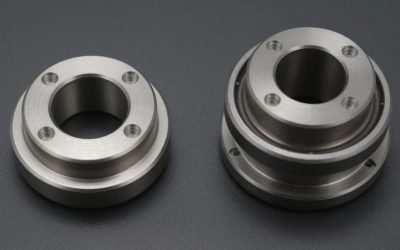
Well Seal Configurations and Applications
Understanding how different well seal configurations match up with various pumping systems really matters when it comes to keeping your well operating smoothly and safely. Each type of seal, from single-hole to blank designs, serves a very specific role—choosing the wrong one can mean costly problems later. Here’s what you need to know about the most common configurations and where they fit best.
Single Hole Seals for Common Pumps
Single hole seals are probably what you’ll see most if you deal with standard home water wells. Here’s why people pick them:
- Made for setups with one drop pipe—usually used with either a shallow well jet pump or a submersible pump.
- Most come with both a small vent hole and a cable hole for submersible pump wiring.
- Great for well casings anywhere from 4” to 12”, though the actual pipe size going down might be only 1” or 2”.
Single hole seals are a solid choice for basic home water supply situations where you don’t need anything fancy—just steady water delivery.
Double Hole Seals for Deep Well Jet Pumps
If you need to draw water from deeper underground, the double hole seal comes into play.
- Double hole designs have two drop pipe openings—one for the larger riser pipe and one for the smaller pressure (drive) pipe.
- There’s only a vent; you won’t find a cable port, since jet pumps don’t need power cables down the well.
- Used with deep well jet pumps where water must travel far below the surface before you can bring it up.
| Configuration | Use Case | Number of Pipes | Features |
|---|---|---|---|
| Single Hole | Standard pumps | 1 | Cable & vent holes |
| Double Hole | Deep well jet pumps | 2 | Only vent, no cable |
| Blank | Sealing unused or pitless | 0 | Solid cap, no holes |
Blank Seals and Their Specific Uses
Blank well seals are pretty rare but sometimes exactly what’s needed:
- Used when you’re capping a well that isn’t currently in operation, or as a temporary seal.
- No pipe holes at all—just a solid plate that covers the casing.
- Sometimes, these get used when a well relies on a pitless adapter and doesn’t need any pipes entering through the top.
- Quick summary:
In most well projects, picking the right seal type is actually less about fancy features and more about making sure the setup matches the pump you’re using and the water depth you’re dealing with. Even folks who’ve been doing this for years sometimes need to double-check the layout before making that final hardware pick—it just saves a headache later.
Factors Influencing Seal Performance
So, you’ve got your well drilled, and now it’s time to think about the seal. It’s not just a one-size-fits-all deal, you know? A bunch of things play a role in how well that seal actually does its job, especially when you’re talking about different depths. Getting the right seal for your specific well setup is pretty important for keeping things clean and working right.
Borehole and Casing Diameter Considerations
First off, let’s talk about sizes. The space between your well casing (that’s the pipe lining the hole) and the borehole wall itself is a big deal. If this gap is too small, it’s a real headache to get a good, solid seal down there. You need enough room to properly place your sealing material, whether that’s grout or something else. Think of it like trying to fill a narrow crack versus a wider one – the wider one is just easier to pack full.
- Ideal Gap: Generally, you want the borehole diameter to be at least 2 inches larger than the casing diameter. So, if you’ve got a 4-inch casing, aim for a borehole that’s at least 6 inches across.
- Consequences of a Small Gap: Difficulty in placing grout, potential for incomplete sealing, and increased risk of contamination pathways.
- Measurement is Key: Always double-check your measurements. Getting this wrong means you might have to go back and re-drill, which nobody wants.
Well Design and Aquifer Characteristics
Every well is a bit different, right? The way the well is designed and what kind of water source (aquifer) you’re tapping into really matters for the seal. For instance, if you’re dealing with a very permeable aquifer, you might need a more robust sealing approach to prevent unwanted water from getting in or your well water from escaping.
- Aquifer Type: Sandy or gravelly aquifers might require different sealing strategies than bedrock. The flow rate and pressure of the water in the aquifer are also factors.
- Well Depth: Deeper wells, as we’ve discussed, often need stronger, more durable seals.
- Geological Layers: The type of soil and rock you drill through can affect how well a seal holds over time. Some layers might shift or settle, putting stress on the seal.
Pump Type and Water Source Depth
Finally, what kind of pump you’re using and how deep your water source is directly impacts the seal you’ll need. A shallow well pump has different requirements than a deep well submersible pump. The weight of the pump and the drop pipe, for example, puts a load on the seal. For deeper wells, the pressure and the sheer length of pipe involved mean the seal has to be tough.
The seal isn’t just about keeping surface junk out; it’s also about making sure the water you’re pumping stays clean and that the seal itself can handle the physical demands of the pump system. A seal that’s too weak or improperly installed can lead to leaks, contamination, and pump issues down the line.
- Submersible Pumps: These sit down in the well, so the seal needs to accommodate the pump and its wiring, often requiring a double-hole configuration.
- Jet Pumps: These can be above ground or in the well, and their setup influences the seal’s design.
- Static Water Level: How far down the water is when the pump isn’t running affects the pressure the seal might experience.
Protecting Against Surface Contamination
So, you’ve gone through all the trouble of drilling a well, and you’re finally hitting water. That’s great! But hold on a second, the job isn’t quite done yet. Before you can kick back and enjoy that fresh water, you absolutely have to seal your well properly. Think of it like putting a lid on a jar – you don’t want anything nasty getting in, right? Without a good seal, all sorts of unwanted stuff from the surface can sneak down into your well water. We’re talking about rainwater runoff, maybe some animal droppings, or even chemicals from nearby. This can really mess up your water quality, and nobody wants that.
The Role of Seals in Preventing Contamination
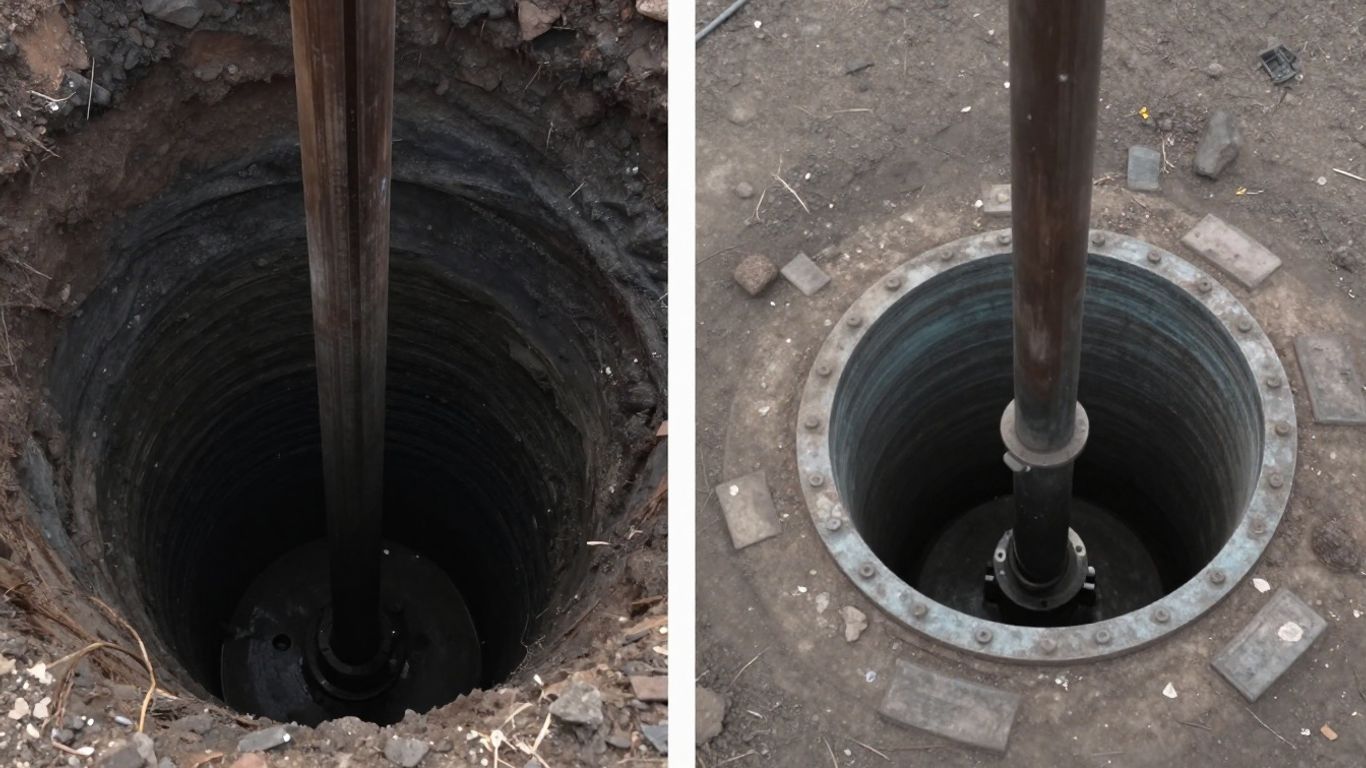
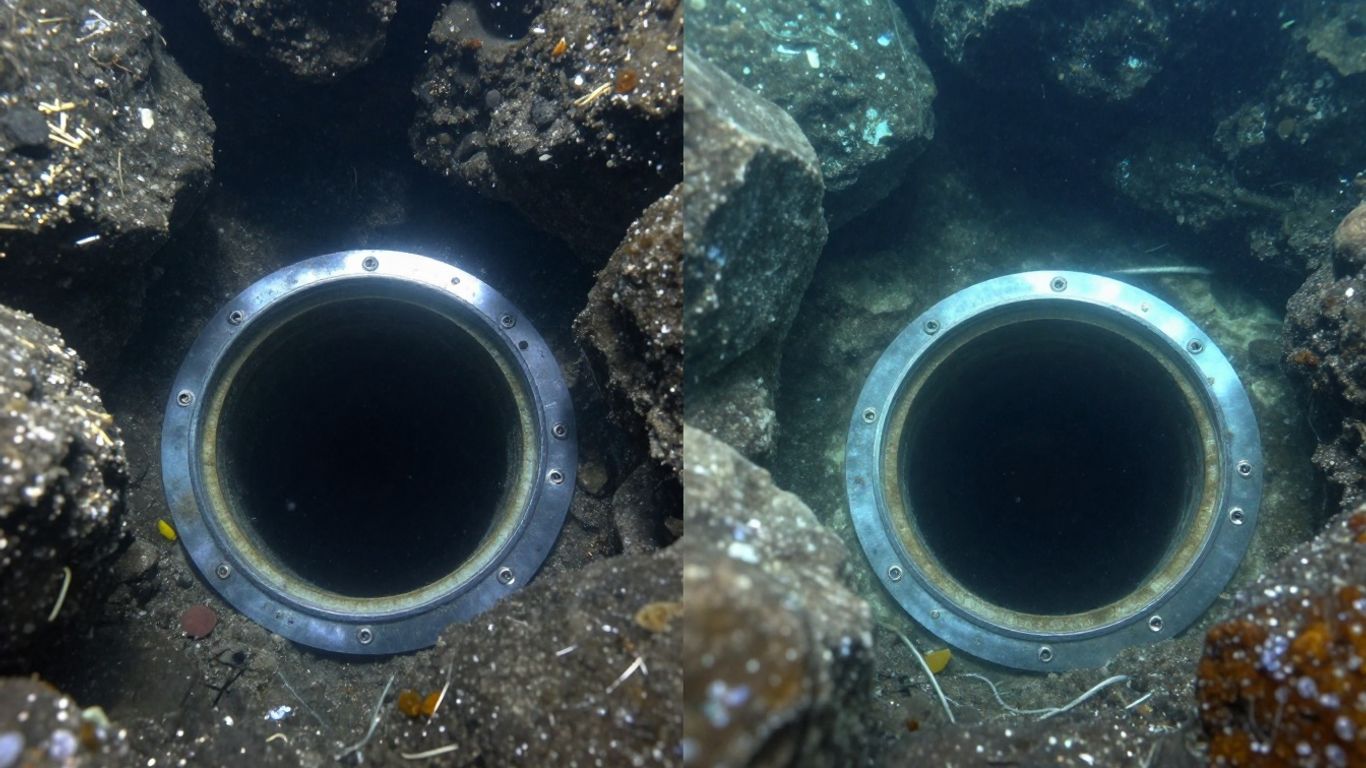
Basically, the seal acts as the first line of defense. It’s a barrier that keeps the surface world separate from the clean water down below. When we talk about well seals, we’re often referring to the grout or sealant that fills the gap between the well casing (that pipe going down into the ground) and the borehole itself. This space, called the annular space, is a prime pathway for contaminants if it’s not properly sealed. A well-installed seal prevents surface water from channeling down this space and reaching your aquifer. It’s not just about keeping out obvious dirt; it’s about stopping dissolved contaminants that you can’t even see.
Sealing the Upper Borehole Section
When you’re finishing up your well, paying attention to the upper part of the borehole is super important. This is the area closest to the surface, where the risk of contamination is highest. You want to make sure this section is sealed off really well, usually by filling that annular space with a grout mixture. This grout hardens and creates a solid barrier. It’s often recommended to extend this seal down at least 20 feet, or even deeper if possible, especially if there isn’t a solid layer of impermeable clay or rock to stop contaminants sooner. Sometimes, a bentonite clay slurry is used because it swells up when wet, creating a tight seal.
Ensuring a Sanitary Seal
What makes a seal "sanitary"? It’s all about how well it blocks contaminants. Here are a few key things to think about:
- Depth Matters: The seal needs to go deep enough to reach a layer that doesn’t let water pass through easily, like a thick clay deposit. If there’s no such layer above your water source, the seal should go down to the top of your gravel pack, and ideally, be at least 20 feet deep.
- The Right Materials: Using a "neat" cement grout (cement mixed only with water, no sand) or bentonite is generally best. These materials form a dense, impermeable barrier when they set.
- Proper Installation: The grout needs to be placed carefully to avoid leaving any gaps or pockets of air or water. Methods like using a tremie pipe, which is slowly pulled up as the grout is pumped in, help ensure the entire annular space is filled.
- Surface Management: Don’t forget the area right around the wellhead. The ground should slope away from the casing to prevent water from pooling. A well cap that fits tightly and is in good condition is also vital to keep bugs and debris out.
A well-designed and properly installed seal is your best bet for keeping your well water safe to drink. It’s a critical step that shouldn’t be rushed or overlooked. Think of it as an investment in your water’s future. Regular checks of the seal and the wellhead area are also a good idea to catch any potential problems early on.
Wrapping It Up
So, when it comes down to it, sealing a well isn’t just a quick step; it’s a pretty important part of the whole process, especially when you’re dealing with different depths. For those shallower wells, you might get away with simpler methods, but the deeper you go, the more you need to be careful and use the right techniques to make sure everything is protected. Whether it’s about the depth of the seal, the space around the pipe, or the materials you use, getting it right means your water stays clean and safe. It’s not the most glamorous part of well work, but it’s definitely one of the most necessary for a job well done.
Frequently Asked Questions
Why is it important to seal a well?
Sealing a well is super important because it keeps dirty stuff from the surface, like rainwater runoff or animal waste, from getting into your drinking water. Think of it like putting a lid on a jar to keep it clean inside. A good seal protects your water from getting yucky and unsafe to drink.
How deep should a well seal go?
The seal needs to go down deep enough to create a solid barrier. Ideally, it should reach the first layer of hard, packed dirt or rock that water can’t easily get through. If there’s no such layer, it should at least go down to the top of the gravel pack that surrounds your well. A common recommendation is to make the seal at least 20 feet deep.
What’s the difference between seals for deep and shallow wells?
The main difference is how deep they need to reach and the materials used. Shallow wells (under 25 feet) might use simpler seals, while deep wells need stronger seals made from materials like steel or stainless steel that can handle the pressure and depth. Also, how the seal is installed can differ, with deeper wells often needing more advanced methods to ensure a complete seal.
What materials are best for well seals?
For most wells, ABS plastic seals are a great choice because they don’t rust and are affordable. Cast iron was used a lot in the past but can rust or crack. For really deep wells, steel or stainless steel seals are the strongest and most reliable option, even though they usually cost more.
What is grouting, and why is it used for well seals?
Grouting means filling the space between the well pipe (casing) and the hole in the ground with a special mixture, usually cement or bentonite clay. This mixture hardens and creates a watertight seal. For deeper wells, a method called ‘tremie piping’ is often used to make sure the grout fills the entire space from the bottom up, ensuring no leaks can occur.
Can I use any kind of pipe for my well seal?
No, you need to use the right type and size of pipe. Well seals are designed with specific holes for different pump setups. For example, a single-hole seal is for pumps with one pipe going down, while a double-hole seal is for deep well jet pumps that need two pipes. Using the correct seal and pipe setup is crucial for the pump to work right and for the well to be sealed properly.