Keeping your well seals in good shape is pretty important if you want things to run smoothly. It’s not the most exciting topic, I know, but ignoring it can lead to bigger headaches down the road. This article will walk you through the basics of how to maintain well seals for peak performance, covering what they do, how to check them, and what to do when things go wrong. Think of it as a friendly guide to avoiding costly problems.
Key Takeaways
- Know how your well seals work and why they matter for keeping your system running right.
- Regularly look at and listen to your seals, and keep an eye on pressure and flow numbers to catch problems early.
- Make sure seals get the right care, like cleaning and checking that the materials work well together and with the environment.
- Learn to spot common seal issues, like leaks, and decide if a repair or a full replacement is the best move.
- Proper installation and watching how operational stress affects seals helps them last longer and perform better.
Understanding Well Seal Functionality
Alright, let’s get down to the nitty-gritty of what makes well seals tick. It might sound a bit technical, but honestly, it’s not that complicated once you break it down. These seals are the unsung heroes keeping your well system running smoothly and safely.
The Critical Role of Well Seals
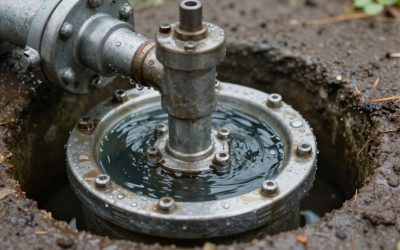
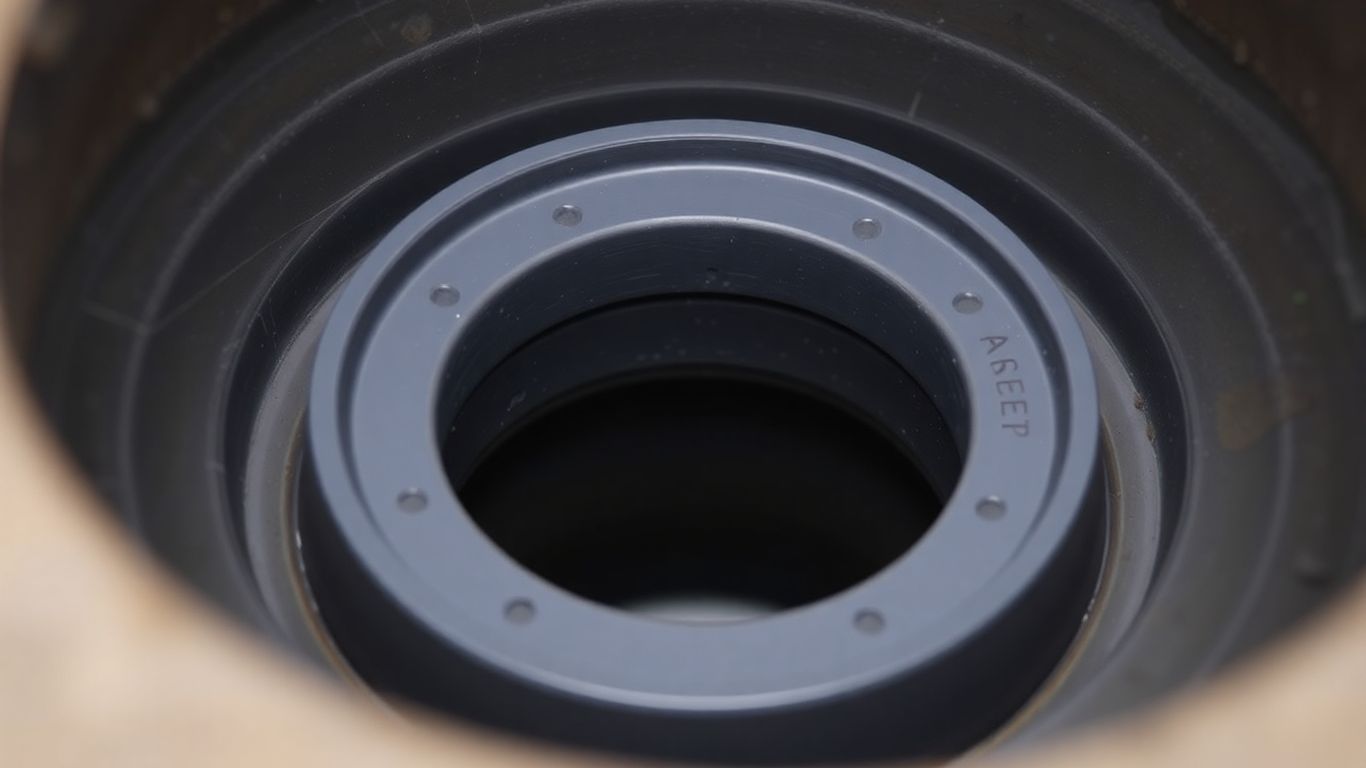
Think of well seals as the gatekeepers for your well. Their main job is to stop unwanted stuff from getting into the wellbore and, just as importantly, to keep the stuff that should be in the well from escaping. This means keeping out surface contaminants like dirt, rainwater, and even small critters. It also means preventing valuable fluids or gases from leaking out into the surrounding environment. Without a good seal, you’re looking at potential contamination of your water source or loss of production, which is a big problem. It’s all about maintaining the integrity of the well and the resources it accesses.
Common Well Seal Types and Their Applications
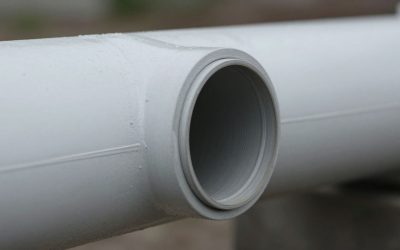
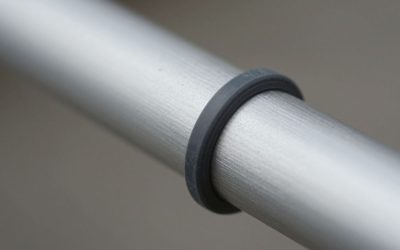
There’s a few different kinds of seals out there, and they’re used depending on what the well is for and what conditions it’s facing. You’ve got your basic O-rings, which are simple rubber rings that create a tight fit. Then there are packing glands, which use a series of rings compressed together to form a seal, often adjustable. For more demanding situations, you might see specialized mechanical seals or even custom-molded seals designed for specific pressures and temperatures. The type of seal you’ll find really depends on the job:
- Water wells: Often use simpler, robust seals to keep out surface water and debris.
- Oil and gas wells: Require seals that can handle high pressures, corrosive fluids, and extreme temperatures.
- Geothermal wells: Need seals that can withstand constant heat and potentially abrasive fluids.
Factors Affecting Well Seal Integrity
So, what can mess with a seal’s ability to do its job? A bunch of things, really. The environment plays a big part. If you’ve got really hot or cold temperatures, or if there are chemicals in the ground or water, that can wear down the seal material over time. The pressure inside the well is another huge factor; if it’s too high for the seal, it’ll start to fail. And, of course, how the well is operated matters. Constant pressure fluctuations or rough handling during maintenance can put stress on the seals.
It’s easy to overlook these components because they’re usually out of sight, but their condition directly impacts the overall health and efficiency of the entire well system. A small problem with a seal can quickly snowball into a much larger, more expensive issue if not caught early.
Routine Inspection Protocols for Well Seals
Checking your well seals regularly is a big part of keeping things running smoothly. It’s not something you want to put off. Think of it like checking the oil in your car – a simple task that can prevent major headaches down the road.
Visual Inspection Techniques
This is where you get your eyes on the seals. You’re looking for anything that seems out of place. A clean, dry seal is usually a happy seal.
- Look for cracks or splits in the seal material. Even small ones can let things in.
- Check for signs of abrasion or wear. Is the surface looking rough or shiny in spots?
- See if there’s any leakage. This could be water, oil, or whatever else is supposed to be contained.
- Make sure the seal is seated properly. It shouldn’t be bulging or twisted.
Auditory Clues Indicating Seal Issues
Sometimes, you can hear problems before you see them. Your ears can be a surprisingly good tool for spotting seal trouble.
- Listen for hissing sounds. This often points to a leak, especially under pressure.
- Pay attention to any unusual grinding or squealing noises. These could mean the seal is rubbing against something it shouldn’t be.
- A sudden change in the normal operating sounds of the well equipment might signal a seal problem.
Pressure and Flow Rate Monitoring
This is where you bring in some actual data. Watching the numbers can tell you a lot about what’s going on internally.
- Keep an eye on the pressure gauges. A drop in pressure that can’t be explained by normal operation is a red flag.
- Monitor flow rates. Unexpected changes here can indicate that the seal isn’t doing its job of keeping fluids where they belong.
- Compare current readings to historical data. This helps you spot deviations that might be subtle at first.
Regular checks don’t need to be complicated. A quick walk-around, a listen, and a glance at the gauges can catch a lot of potential issues before they become serious problems. It’s about being observant and knowing what’s normal for your specific setup.
Remember, these inspections are your first line of defense. Catching a small issue early can save you a lot of time and money compared to dealing with a full-blown failure.
Preventative Maintenance Strategies
Keeping your well seals in good shape before they become a problem is way smarter than dealing with a mess later. It’s all about being proactive. Think of it like changing the oil in your car; you do it regularly to avoid bigger engine trouble down the road. The same idea applies here.
Scheduled Lubrication and Cleaning
Regularly cleaning and lubricating your well seals can make a huge difference. Dirt and debris can get into the seal mechanism, causing it to wear out faster or even fail completely. Lubrication helps keep things moving smoothly and prevents the seal material from drying out or cracking.
- First, clear away any loose dirt or grit around the seal area. A soft brush or compressed air usually does the trick.
- Next, apply a compatible lubricant. Make sure it’s the right kind for your specific seal material and the operating environment. Using the wrong stuff can actually damage the seal.
- Finally, wipe away any excess lubricant. You don’t want it attracting more dirt.
Material Compatibility Checks
It’s not just about keeping things clean; you also need to make sure the materials your seals are made from are playing nice with everything else they come into contact with. Chemicals, temperature extremes, or even just the fluid being pumped can degrade certain seal materials over time. If you’re not sure what your seals are made of or what they’re exposed to, it’s worth finding out.
Sometimes, a seal might look fine on the outside, but internal chemical reactions are slowly breaking it down. This is why knowing the exact composition of your well fluids and the seal material is so important for long-term reliability.
Environmental Factor Mitigation
What’s going on around the wellhead can also impact your seals. Extreme temperatures, whether hot or cold, can make seal materials brittle or soft. High humidity or exposure to corrosive elements in the air can also take their toll. Taking steps to protect the seals from these outside influences can extend their life significantly. This might involve:
- Installing protective covers or shrouds.
- Ensuring proper ventilation to prevent heat buildup.
- Applying protective coatings where appropriate, if compatible with the seal and environment.
Addressing Common Well Seal Failures
Even with the best maintenance, well seals can sometimes give you trouble. Spotting these issues early is key to preventing bigger problems down the line. Don’t wait until a small leak becomes a major headache.
Identifying Signs of Wear and Tear
Seals don’t last forever, and they show their age. Keep an eye out for these common indicators:
- Surface Cracks or Splits: Look for any visible breaks in the seal material. These are often the first signs that the material is degrading.
- Hardening or Brittleness: If the seal feels stiff and inflexible, it’s lost its elasticity and won’t seal properly.
- Surface Abrasion: Excessive wear on the sealing surface can reduce its effectiveness and lead to leaks.
- Discoloration or Swelling: Changes in the seal’s appearance can point to chemical attack or improper material compatibility.
Troubleshooting Leaks and Ingress
Leaks are the most obvious sign of seal failure, but they can be tricky to pinpoint. Here’s how to approach it:
- Visual Inspection: Start by looking for obvious drips or wet spots around the seal area. Sometimes, a simple visual check is all you need.
- Pressure Testing: If you suspect a leak but can’t see it, a pressure test can help confirm. Apply a controlled pressure and monitor for drops.
- Dye or Smoke Testing: For hard-to-find leaks, introducing a colored dye or smoke into the system can make the escape route visible.
- Listen Carefully: Sometimes, you can hear a faint hissing sound indicating escaping fluid or gas.
Remember that even small amounts of water or contaminants getting into your well system can cause significant damage over time. This ingress can lead to corrosion, equipment malfunction, and reduced water quality.
Repair vs. Replacement Decisions
Once you’ve found a problem, you’ll need to decide what to do. It’s not always a clear-cut choice.
- Minor Wear: If it’s just a bit of surface scuffing and the seal is otherwise sound, a good cleaning and perhaps some specialized lubricant might get you by for a while.
- Significant Damage: Cracks, deep gouges, or material degradation usually mean replacement is the only reliable option.
- Cost-Benefit Analysis: Consider the cost of a new seal versus the potential cost of damage caused by a failing seal. Often, replacing it is cheaper in the long run.
- Availability: Sometimes, you might have to wait for a specific replacement part. If the system can tolerate a temporary fix, that’s an option, but be aware of the risks.
Optimizing Well Seal Lifespan
So, you’ve got your well seals in place, and they’re doing their job. But how do you make sure they keep doing it for as long as possible? It’s not just about slapping them in and forgetting about them. There’s a bit more to it if you want peak performance over the long haul. Proper installation and managing how the well operates are key players here.
Proper Installation Techniques
Getting the seal in right the first time makes a huge difference. It’s like building a house – if the foundation is shaky, the whole thing is going to have problems down the line. For seals, this means:
- Cleanliness is paramount: Make sure the surfaces where the seal will sit are spotless. Any dirt or debris can cause an immediate leak or damage the seal during installation.
- Correct alignment: The seal needs to be perfectly centered. If it’s crooked, it’ll wear unevenly and fail much faster.
- Using the right tools: Don’t try to force a seal in with a screwdriver. Use the proper installation tools designed for that specific seal type. This prevents nicks, tears, or stretching.
- Following manufacturer guidelines: Every seal has its own quirks. Always check the instructions that come with it. They know their product best.
Impact of Operational Stress
How you run your well equipment directly affects how long the seals last. Think of it like driving a car – if you’re constantly flooring it and slamming on the brakes, the brakes and tires won’t last as long as if you drive smoothly.
- Pressure fluctuations: Big swings in pressure put extra strain on the seal. Try to keep pressures as steady as possible.
- Temperature extremes: Seals have operating temperature ranges. Pushing them beyond these limits, either too hot or too cold, can make them brittle or soft, leading to failure.
- Vibration and shock: Constant shaking or sudden jolts can loosen fittings or cause the seal to fatigue prematurely.
- Chemical exposure: If the fluid or gas in the well is aggressive, it can eat away at the seal material over time. Make sure your seal is made of something that can handle what’s in the well.
It’s easy to overlook the subtle ways that daily operations can wear down a seal. Sometimes, it’s not a dramatic event, but a slow, steady accumulation of stress that leads to a leak. Paying attention to these small details can prevent bigger headaches later.
Long-Term Performance Tracking
Keeping an eye on how your seals are performing over time is just good practice. It helps you catch problems before they become major issues and gives you data for future decisions.
- Record keeping: Log when seals were installed, any maintenance performed, and any issues noted. This creates a history.
- Regular checks: Even if you’re not doing a full inspection, a quick look during routine operations can reveal early signs of trouble.
- Performance metrics: Monitor things like flow rates and pressure. If they start to drift from normal, it could be a sign the seal isn’t doing its job perfectly anymore.
- Scheduled replacements: Based on your tracking and the expected lifespan of the seal type, plan for replacements before failure. This avoids costly downtime.
Advanced Techniques for Seal Performance
Utilizing Advanced Monitoring Tools
Beyond the basic checks, there’s a whole world of tech out there to keep tabs on your well seals. Think sensors that can pick up on tiny vibrations or temperature shifts that might signal trouble long before you’d ever notice it yourself. These tools give you a real-time look at what’s happening down there. Paying attention to these subtle signals can prevent major headaches later on.
- Vibration Analysis: Detects unusual shaking that could mean wear or misalignment.
- Temperature Monitoring: Spots overheating, a common sign of friction or seal failure.
- Acoustic Sensors: Listens for changes in sound that might indicate leaks or internal damage.
These advanced systems often connect to a central dashboard, giving you a clear overview of all your wellheads. It’s like having a doctor constantly checking your pulse, but for your equipment.
Implementing Predictive Maintenance
This is where you move from just fixing things when they break to actually guessing when they might break and fixing them beforehand. It’s all about using the data from those advanced monitoring tools to spot patterns. If a seal usually starts showing certain vibration levels a month before it fails, you can schedule maintenance during that window. It saves time, money, and avoids unexpected downtime.
Seal Material Innovations
The materials used in seals are always getting better. Researchers are constantly developing new compounds that can handle tougher conditions – think higher temperatures, more aggressive chemicals, or just plain more pressure. Staying updated on these material science advancements means you can choose seals that are built to last longer and perform better in your specific well environment. It’s not just about rubber anymore; there are advanced polymers and composites that offer superior resistance and durability.
Wrapping It Up
So, keeping your well seals in good shape really isn’t rocket science. A little regular checking and some basic upkeep go a long way. Think of it like changing the oil in your car – you don’t wait for it to break down, right? Doing these simple things means your well system will just keep running smoothly, saving you headaches and probably some cash down the line. Don’t let those seals get forgotten; a bit of attention now means a lot less trouble later.
Frequently Asked Questions
What exactly do well seals do?
Think of well seals as the guardians of your well. Their main job is to keep unwanted stuff, like dirt, bugs, and surface water, from getting into your well water. They also make sure the clean water stays put and doesn’t leak out. It’s all about keeping your water safe and your well working right.
How often should I check my well seals?
It’s a good idea to give your well seals a quick look every few months. A more thorough check, maybe listening for strange noises or looking for cracks, should happen at least once a year. Regular peeks help catch small problems before they become big headaches.
What are the signs that a well seal might be failing?
Watch out for puddles around your wellhead, especially when it hasn’t rained. You might also hear unusual sounds, like hissing or gurgling, coming from the well. Sometimes, the water pressure might drop, or you could notice changes in your water quality, like cloudiness or a funny smell. These are all clues that something’s not right with the seal.
Can I fix a broken well seal myself?
For minor issues, like cleaning around the seal, you might be able to handle it. But if you see cracks, major leaks, or suspect a serious problem, it’s best to call a professional. They have the right tools and know-how to fix it properly, ensuring your water stays safe.
What’s the best way to make well seals last longer?
Keeping the area around your well clean is super important. Avoid letting chemicals or anything harmful get near it. Also, making sure the seal is installed correctly in the first place makes a huge difference. Regular checks and prompt repairs when needed will also extend its life significantly.
Are there different kinds of well seals?
Yes, there are! The most common ones are rubber seals, which are flexible and great for sealing gaps, and concrete seals, which are more permanent and used for the well casing. The type used often depends on the well’s design and what it needs to protect against. Your well professional can tell you which type is best for your situation.