You know, sometimes the simplest things can cause the biggest headaches. Like with those well seals in industrial systems. You might think they’re just small parts, but when they’re not put in right, things can go really wrong. This article is all about why properly installed well seals reduce risk of system failure. We’ll look at how putting them in the right way, keeping things clean, and thinking about the environment they’re in makes a huge difference. It’s not rocket science, but it does take a bit of care.
Key Takeaways
- Putting well seals in correctly is super important to stop systems from breaking down.
- Damage to the seal lip or putting it in backward during installation leads to problems.
- Dirt and other junk getting into the seal area can ruin its effectiveness.
- Things like heat, chemicals, and pressure changes can wear out seals over time.
- Regular checks and making sure everything is aligned properly helps seals last longer.
Understanding the Critical Role of Well Seals
Why Properly Installed Well Seals Reduce Risk of System Failure
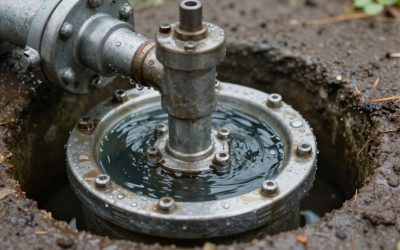
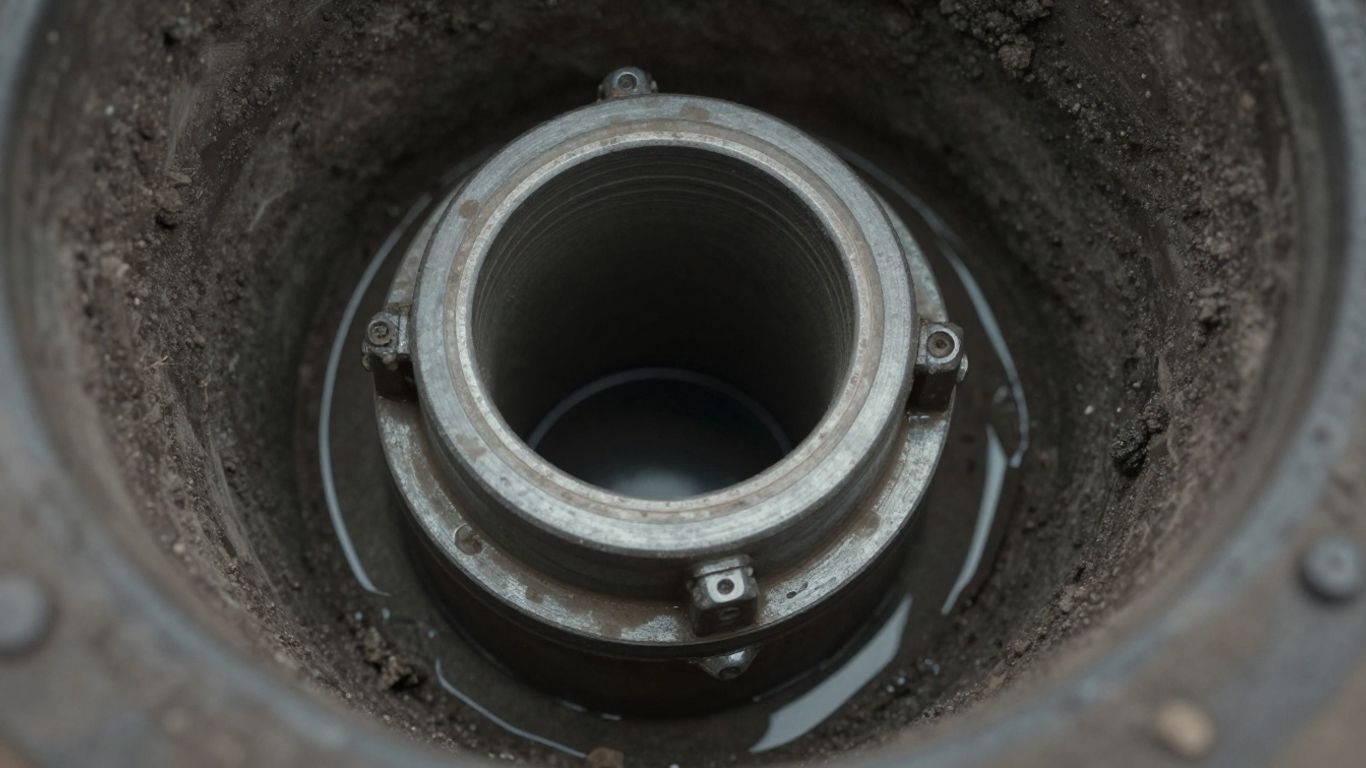
Think of a well seal like the gasket on a jar lid. It might seem small, but it’s doing a really important job. In industrial systems, these seals keep fluids in and contaminants out. When they’re installed right, they work like a charm, preventing leaks and keeping everything running smoothly. But get it wrong, and you’re asking for trouble. A poorly installed seal is practically an invitation for system failure.
It’s not just about stopping drips. A good seal maintains the right pressure, keeps lubricants where they need to be, and stops dirt or water from getting into sensitive parts. This all adds up to equipment that lasts longer and performs better. We’re talking about avoiding costly breakdowns and keeping production lines moving.
Here’s a quick look at why getting the installation spot-on matters:
- Prevents Leaks: This is the most obvious one. Leaks mean lost product and potential environmental hazards.
- Keeps Contaminants Out: Dirt, dust, and moisture can wreck machinery from the inside out.
- Maintains System Pressure: Many systems rely on specific pressure levels to function correctly. Seals are key to this.
- Reduces Wear: By keeping lubricants in place and debris out, seals help reduce friction and wear on moving parts.
The integrity of a well seal is directly tied to the reliability of the entire system it’s part of. Even a minor issue during installation can lead to significant problems down the line, impacting everything from efficiency to safety.
The Importance of Seal Integrity in System Performance
When we talk about seal integrity, we mean the seal is whole, undamaged, and doing exactly what it’s supposed to do. This isn’t just about the seal itself; it’s about how it affects the whole machine. A seal that’s compromised, even slightly, can start a chain reaction of problems. For instance, a tiny nick in the seal lip during installation might not seem like a big deal at first, but it can allow a small amount of fluid to escape or a bit of grit to get in. Over time, this small issue can lead to bigger ones, like corrosion or increased friction, which then cause other parts to wear out faster.
Consequences of Seal Failure on Industrial Operations
When a seal fails, the consequences can be pretty severe. We’re not just talking about a little mess. Depending on the system, a seal failure can lead to:
- Downtime: This is usually the biggest hit. When a machine stops working, production stops, and that costs money. Sometimes it’s just a few hours, but it can stretch into days or even weeks if the damage is extensive.
- Product Loss or Contamination: If the seal is supposed to keep a product in, a failure means losing that product. If it’s supposed to keep contaminants out, then the product can be ruined.
- Safety Hazards: In some applications, a seal failure could lead to dangerous situations, like leaks of hazardous materials or equipment malfunctions that put people at risk.
- Increased Maintenance Costs: Fixing a failed seal is one thing, but if the failure caused damage to other parts, the repair bill gets much bigger. You might need to replace not just the seal but also bearings, shafts, or other components.
- Environmental Damage: Leaking fluids, especially if they’re chemicals or oils, can cause significant environmental harm, leading to cleanup costs and potential fines.
Installation Best Practices for Seal Longevity
Getting a seal installed right the first time is a big deal. It’s not just about shoving it in place; there’s a bit more to it if you want it to last. Think of it like building something – if the foundation isn’t solid, the whole thing can fall apart. The same goes for seals. A poorly installed seal is practically begging for trouble.
Preventing Seal Lip Damage During Installation
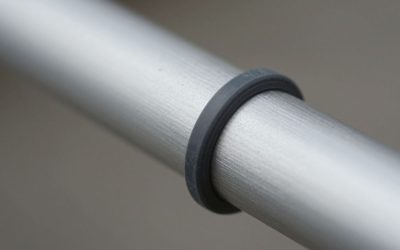
The sealing lip is the part that actually does the work, and it can be surprisingly delicate. Whether it’s rubber or a more modern material like PTFE, these lips can get nicked, torn, or even flipped inside out if you’re not careful. This usually happens when the seal is being pushed into its housing. If the entry point isn’t smooth or if there’s a sharp edge, you’re asking for damage. It’s like trying to slide a piece of paper through a tight, rough slot – it’s going to snag.
- Check the lead-in: Make sure there’s a smooth, chamfered edge where the seal has to slide over. This gives it a gentle ramp instead of a sharp corner to fight against.
- Use the right tools: Don’t just jam it in with a screwdriver. Use proper installation sleeves or tools designed for the specific seal size. These tools help guide the seal evenly and protect the lip.
- Inspect the housing: Before you even start, give the seal housing a quick look. Any burrs, debris, or rough spots? Clean them up. A clean, smooth path is key.
Ensuring Correct Seal Orientation and Lubrication
It sounds simple, but putting a seal in backward is a common mistake. Seals are often designed with a specific direction of rotation in mind, sometimes even having tiny grooves that help pump lubricant. If it’s backward, it won’t seal properly and might even push fluid where you don’t want it. Also, a little bit of lubrication during installation goes a long way. It reduces friction, making installation easier and preventing that initial wear that can happen when the seal is dry.
Here’s a quick checklist:
- Direction Matters: Always confirm the seal’s intended orientation. Look for markings on the seal itself or consult the manufacturer’s diagram. Is there a specific side that faces the fluid? Is there a directional pumping feature?
- Lubricate Wisely: Use a compatible lubricant – usually the same fluid the seal will be working with, or a recommended installation grease. Apply it thinly to the seal lip and the housing.
- Gentle Insertion: Avoid forcing the seal. If it’s not going in smoothly, stop and check for obstructions or misalignment.
The Impact of Installation Geometry on Seal Performance
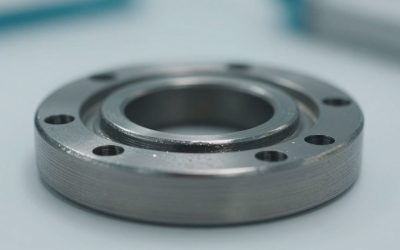
The shape and fit of the seal housing, often called the gland, are super important. If the gland is machined incorrectly – maybe the diameter is off, or the corners are too sharp or too rounded – it can mess with how the seal sits and performs. For instance, if the gland is too loose, the seal might not get enough pressure, leading to leaks. If it’s too tight in the wrong places, it can cause uneven wear. Even the surface finish of the metal parts the seal rubs against plays a role. Too smooth, and lubricant can’t stick; too rough, and it wears the seal out fast.
The precise dimensions of the seal housing and the finish of the mating surfaces are not minor details; they directly influence how the seal interacts with its environment and how long it can effectively perform its job. Getting these aspects right from the start prevents many headaches down the line.
| Feature | Ideal Condition | Potential Problem |
|---|---|---|
| Gland Diameter | Within manufacturer’s specified tolerance | Too loose (leakage) or too tight (excessive wear) |
| Corner Radii | Smooth, specified radius | Sharp edges (damage) or too large (overfill, extrusion) |
| Surface Finish | Appropriate roughness for lubricant retention | Too smooth (no lube retention) or too rough (wear) |
Mitigating Contamination Risks for Well Seals
Alright, let’s talk about keeping gunk out of your well seals. It might sound simple, but honestly, contamination is a sneaky saboteur that can bring your whole system down. Think of it like trying to eat soup with a fork – it just doesn’t work well when there are bits of stuff floating around that shouldn’t be there.
How Debris Compromises Seal Effectiveness
Little bits of dirt, metal shavings, or even just dust can wreak havoc. When these particles get into the seal area, they can get ground up between the seal and the shaft or housing. This isn’t just annoying; it actively damages the seal’s ability to do its job. Even microscopic debris can create tiny channels for leaks to start. Over time, this wear accelerates, leading to premature seal failure and, you guessed it, system downtime. It’s like sandpaper for your seals.
Strategies to Prevent Foreign Particle Ingress
So, how do we stop this from happening? It starts with being mindful during installation and throughout the system’s life. Here are a few key things to focus on:
- Cleanliness is King: Always work in a clean environment when installing seals. Wipe down shafts, housings, and the seals themselves before assembly. Don’t just assume things are clean.
- Proper Handling: Treat seals with care. Avoid dropping them or letting them roll around in a toolbox where they can pick up grit. Use clean tools and gloves.
- Seal Design Awareness: Some seals have features designed to shed contaminants, but they still need a clean starting point. Understanding the seal’s design can help you install it correctly to take advantage of these features.
- Protective Measures: Consider using protective covers or temporary seals during assembly or when the system is idle, especially in dusty or dirty environments. This is especially important if your well casing has any issues, like a crack or a bent section, which can let in unwanted material Ensuring the well cap and seal are intact is crucial for maintaining water quality.
The Role of Filtration and Handling Protocols
Beyond just being careful during installation, think about the fluids running through your system. If there are particles in the fluid, they can eventually reach the seal. Implementing good filtration systems is a smart move. This means having filters in place that can catch the problematic particles before they get a chance to cause trouble. Also, having clear handling protocols for seals and system components is vital. This means everyone involved knows the right way to store, handle, and install these parts. It’s about creating a culture of care around your equipment. A simple table might look like this:
| Component | Contamination Risk | Prevention Strategy |
|---|---|---|
| New Seals | Dust, packaging debris | Store in sealed bags, inspect before use |
| Shafts | Metal shavings, dirt | Clean thoroughly, use lead-in chamfers |
| System Fluids | Particulates, wear debris | Implement appropriate filtration, regular fluid analysis |
A seal that fails due to contamination often points to a breakdown in the procedures surrounding its installation and the overall cleanliness of the operating environment. It’s not just about the seal itself, but the entire ecosystem it operates within. Paying attention to these details can save a lot of headaches down the line.
Addressing Environmental Factors Affecting Seals
Managing High Temperatures and Thermal Cycling
High temperatures can really mess with seals. Think about it, most seal materials aren’t meant to handle extreme heat for long periods. When they get too hot, they can lose their flexibility, get brittle, or even start to break down. This makes them way more likely to leak. Then there’s thermal cycling – that’s when things heat up and cool down repeatedly. This constant expansion and contraction puts a lot of stress on the seal material. Over time, this can lead to cracks or a permanent deformation called compression set, where the seal just doesn’t spring back into shape like it should. It’s super important to pick seal materials that can handle the expected temperature range of your system.
The Impact of Aggressive Chemicals on Seal Materials
Chemicals are another big challenge for seals. If the fluid your seal is working with is too aggressive for the seal material, bad things happen. Some chemicals can cause the seal to swell up like a balloon, which might seem like it’s sealing better at first, but it actually increases friction and can lead to premature wear. Other chemicals can make the seal brittle or even dissolve it completely. You really need to know what chemicals are in your system and make sure your seals are made of a compatible material. It’s not just about the main fluid, either; sometimes additives or contaminants can be just as harsh. Checking a chemical compatibility chart is a good first step before you even think about installing a seal.
Understanding Pressure Fluctuations and Their Effects
Pressure is a big deal for seals, and not just steady pressure. Rapid changes in pressure, like spikes or sudden drops, can be really tough on them. When pressure suddenly increases, it can force the seal material into any small gaps or extrusion gaps that might be present, potentially damaging it. If the pressure drops quickly, it can cause the seal to lose its tight fit, leading to leaks. Systems that experience frequent pressure cycles need seals designed to handle that kind of stress. Sometimes, a backup ring is needed to help prevent the seal from extruding under high pressure. It’s all about making sure the seal can maintain its integrity no matter what the pressure is doing.
- Temperature Extremes: Seals can degrade, become brittle, or swell. Always check the material’s temperature rating. seal leaks
- Chemical Attack: Swelling, hardening, or dissolution of seal material can occur. Material compatibility is key.
- Pressure Surges: Rapid pressure changes can cause extrusion or loss of seal contact. Consider backup rings for high-pressure applications.
Choosing the right seal material and design for the specific environmental conditions is not just a recommendation; it’s a necessity for reliable operation. Ignoring these factors is a direct path to unexpected downtime and costly repairs.
Mechanical Considerations for Seal Reliability
When we talk about seals, it’s not just about picking the right material. How the parts fit together and move is a huge deal for how long a seal lasts. Think of it like building something; if the foundation isn’t right, the whole thing can fall apart. The same goes for seals.
Preventing Wear Through Proper Shaft Alignment
Misaligned shafts are a seal’s worst nightmare. If a shaft isn’t perfectly straight or lined up with its housing, one side of the seal gets squished way more than the other. This uneven pressure means one part of the seal wears out super fast, while the other part might not even be doing its job, leading to leaks. It’s like trying to wear a shoe that’s too tight on one foot and too loose on the other – uncomfortable and not effective.
- Ensure shafts are precisely aligned during assembly. This might mean taking extra time during the build process, but it saves headaches later.
- Check bearing condition regularly. Worn bearings can allow shafts to move unexpectedly, impacting alignment.
- Consider the dynamic forces acting on the shaft during operation. These can cause slight shifts that need to be accounted for in the design.
The Importance of Surface Finish on Mating Components
The surface of the shaft or bore that the seal rubs against needs to be just right. Too rough, and it’s like sandpaper on the seal, wearing it down quickly. Too smooth, and there’s nothing for the lubricant to cling to under the seal’s lip, causing friction and heat. We’re looking for a specific texture that allows for lubrication without causing excessive wear.
Here’s a quick rundown:
- Too Rough: Leads to rapid abrasion and premature seal failure.
- Too Smooth: Prevents lubricant retention, increasing friction and heat.
- Just Right: Allows for a thin lubricating film, minimizing wear and heat.
The machining marks on the shaft or bore matter too. If they’re angled, they can act like a tiny pump, pushing fluid where you don’t want it. Using techniques like plunge grinding can help create a more consistent surface finish without these problematic directional marks.
Minimizing Extrusion Gaps and Their Consequences
An extrusion gap is basically a small space where the seal material can get pushed out, or ‘extruded,’ under pressure. If this gap is too big, high-pressure fluids can force their way into it, damaging the seal over time. It’s like a tiny crack in a dam that slowly gets bigger.
- Tighten component fits: Reducing the clearance between parts helps close up potential extrusion gaps.
- Minimize manufacturing tolerances: Stricter control over how parts are made means less variation and smaller gaps.
- Use backup rings: For high-pressure situations, adding a harder backup ring on the low-pressure side of the seal can physically block the extrusion gap.
Proactive Measures for Seal System Maintenance
Even the best-installed seals need ongoing attention to keep them working right. Think of it like owning a car; you can’t just drive it forever without oil changes or tire rotations. Seals are similar. Regular check-ups and smart upkeep make a huge difference in how long they last and how well they perform.
The Value of Regular Inspections and Audits
Spotting problems before they become big issues is the name of the game here. Routine visual checks can catch things like minor leaks, unusual noises, or changes in temperature around the seal area. These might seem small, but they can be early warnings. Audits go a bit deeper, looking at the whole system – the seal itself, the shaft, the housing, and any support systems. This helps make sure everything is still within spec and hasn’t drifted out of alignment or started to wear unevenly. It’s about catching those little things that, if ignored, can lead to a full-blown failure down the line.
- Visual Inspection: Look for leaks, discoloration, or physical damage.
- Auditory Checks: Listen for any new or unusual sounds.
- Temperature Monitoring: Use infrared thermometers to check for hot spots.
- Support System Review: Verify fluid levels, pressures, and filter conditions.
Training Personnel on Seal Installation and Care
This is a big one. A lot of seal failures can be traced back to installation errors or improper handling. When the folks doing the work understand why certain steps are important – like proper lubrication, correct orientation, and avoiding contamination – they’re much less likely to make mistakes. Training shouldn’t just be a one-time thing either. Refresher courses and sharing lessons learned from past failures can keep everyone sharp. A well-trained team is your first line of defense against seal problems.
Leveraging Condition Monitoring for Early Detection
Beyond basic inspections, modern technology offers ways to keep an eye on seals without even touching them. Condition monitoring tools can track vibration, temperature, and pressure in real-time. If a seal starts to degrade, these subtle changes often show up in the data long before you can see or hear them. This allows maintenance teams to schedule repairs during planned downtime, avoiding costly emergency shutdowns. It’s about being smart and using the data available to predict and prevent issues.
Using advanced monitoring systems can provide a clear picture of seal health. By analyzing trends in vibration, temperature, and pressure, potential issues can be identified and addressed proactively. This data-driven approach shifts maintenance from a reactive to a predictive model, saving time and resources.
Wrapping It Up
So, we’ve talked a lot about how important seals are and how easy it is for them to mess things up if they aren’t put in right. It’s not just about slapping them in and hoping for the best. Little things, like making sure the seal is facing the right way or that there’s no dirt around, can make a huge difference. Getting the installation done correctly from the start really cuts down on headaches later. It saves time, money, and keeps everything running smoothly, which is what we all want, right?
Frequently Asked Questions
What is a well seal and why is it important?
A well seal is like a protective barrier in machines that keeps important fluids in and unwanted dirt or water out. When it’s put in correctly, it helps make sure the machine runs smoothly and prevents problems that could stop it from working.
How can putting in a seal the wrong way cause problems?
If a seal isn’t installed perfectly, its delicate edges can get torn or bent. It can also be put in backward, which means it won’t do its job of keeping things sealed properly. This can lead to leaks and damage to the machine.
What happens if dirt or other junk gets into the seal?
Dirt and tiny particles are like sandpaper for seals. They can scratch and wear down the seal material, creating tiny gaps where fluids can leak out or contaminants can get in. This makes the seal less effective and can lead to bigger issues.
Can hot or cold temperatures hurt seals?
Yes, extreme temperatures can be tough on seals. Very high heat can make them weak and lose their shape, while going from hot to cold and back again can cause them to crack over time. Using seals made for specific temperatures helps a lot.
What is ‘shaft alignment’ and why does it matter for seals?
Shaft alignment means making sure the spinning parts (shafts) line up perfectly. If they are crooked, it puts extra stress on the seal, causing it to wear out much faster. Keeping them lined up helps the seal last longer.
How often should I check my seals?
It’s a good idea to check your seals regularly, kind of like getting your car’s oil changed. Looking for any signs of wear, leaks, or damage during routine checks can help you catch problems early before they cause a major breakdown.