Keeping your home’s well water safe and clean starts with the well seal. It’s that often-overlooked part that keeps gunk out of your water supply. If you’re a homeowner with a well, knowing some basic DIY maintenance tips for well seals can save you headaches and maybe even some cash. It’s not rocket science, and with a little effort, you can help keep your water pure. This guide will walk you through what you need to know.
Key Takeaways
- Your well seal stops bad stuff from getting into your drinking water.
- Regularly look at your wellhead for any problems like cracks or loose parts.
- Keep the area around your well clean and clear of debris and make sure water drains away.
- Protect your wellhead from damage and watch out for water pooling nearby.
- Simple fixes like sealing small cracks or replacing worn gaskets can be done yourself, but know when to call in a pro.
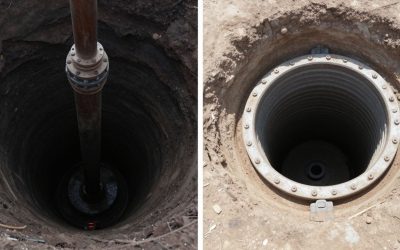
Understanding Your Well Seal’s Role
Alright, let’s talk about the part of your well that you probably don’t think about much unless something goes wrong: the well seal. It might not be the most glamorous part of your home’s water system, but it’s seriously important. Think of it as the gatekeeper for your drinking water. Its main job is to keep nasty stuff out of your well. We’re talking about surface water, bugs, dirt, and anything else that could make your water unsafe to drink.
Why Well Seals Matter for Water Quality
This is where the rubber meets the road, so to speak. A good well seal is your first line of defense against contamination. When rain falls or snow melts, that water can carry all sorts of things with it. If your well seal isn’t doing its job, that water can seep down into your well, mixing with the clean water you rely on. This can lead to serious health issues and make your water taste, smell, or look bad. It’s not just about aesthetics; it’s about safety.
Common Types of Well Seals
There are a few main ways well seals are put together, and knowing which you have can help with inspections. The most common ones include:
- Grout Seals: These are typically made from cement or bentonite clay. They form a solid barrier around the well casing, usually poured into the space between the casing and the drilled hole. They’re pretty effective when they’re intact.
- Mechanical Seals: These use rubber or neoprene gaskets and clamps to create a seal. They’re often found on shallower wells or as part of a pitless adapter system.
- Surface Seals: Sometimes, a combination of materials is used right at the surface to provide an extra layer of protection.
Signs of a Compromised Well Seal
So, how do you know if your well seal might be having problems? Keep an eye out for these things:
- Visible cracks or gaps around the well casing or the concrete pad at the wellhead.
- Standing water pooling around the wellhead, especially after rain.
- Unusual smells or tastes in your water, like a metallic or earthy odor.
- Changes in water clarity – if it suddenly looks cloudy or discolored.
- Pest or insect activity right at the wellhead, which can indicate an opening.
If you notice any of these signs, it’s a good idea to take a closer look. A compromised seal isn’t something to ignore, as it can quickly lead to bigger problems with your water supply. It’s better to catch these issues early before they affect your water quality or cause damage to the well system itself.
Essential Well Seal Inspection Techniques
Alright, so you’ve got your well seal, and you know it’s important. But how do you actually check if it’s doing its job? It’s not rocket science, but you do need to know what you’re looking for. Regular inspections are your first line of defense against contamination. Think of it like checking the tires on your car before a long trip – you wouldn’t just hope for the best, right?
Visual Inspection of the Wellhead
This is the most straightforward part. You just need to look. Start by walking around the entire wellhead. What are you looking for? Anything that seems out of place. Is there any obvious damage? Are there weeds or plants growing too close, potentially interfering with the cap or seal?
- Check the well cap for any signs of damage, like cracks or warping.
- Look at the vent pipe. Is it screened and intact, or is it bent or broken?
- See if there’s any standing water around the wellhead. That’s usually not a good sign.
Standing water can indicate drainage problems or a low spot that might allow surface contaminants to pool near the seal. It’s best to address any pooling water promptly.
Checking for Cracks and Gaps
Now, get a bit closer. You’re looking for small problems before they become big ones. Even tiny cracks can let in bugs, dirt, or water. Run your hand along the concrete base or the casing where it meets the ground. You’re feeling for any rough spots, breaks, or openings.
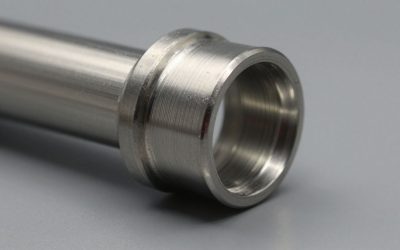
- Inspect the seal between the well casing and the pitless adapter or well seal.
- Look for any separation between the concrete apron and the ground.
- Check the well cap itself for any hairline cracks that might not be obvious from a distance.
Assessing the Grout Seal Integrity
The grout seal, often a bentonite or cement mixture, is what really keeps things from seeping down the outside of your well casing. This is a bit harder to inspect visually, especially if it’s old or covered. You’re looking for signs of cracking, crumbling, or erosion.
- Is the grout seal visible and intact all the way around?
- Does it look like it’s pulling away from the casing or the ground?
- Are there any areas where the grout seems to be missing or has washed away?
If you see anything concerning, especially cracks or gaps, it’s time to think about how to fix it or if you need to call in someone who knows well systems inside and out.
Routine Well Seal Cleaning Procedures
Keeping your well seal clean is a pretty straightforward task, but it’s one of those things that can really make a difference in the long run. Think of it like cleaning out your gutters – you don’t wait for a flood to happen, right? The same idea applies here. A clean wellhead means you can spot problems easier and it just generally helps keep things working right.
Clearing Debris Around the Wellhead
First things first, you want to clear out any junk that’s piled up around the base of your well. Leaves, dirt, grass clippings, maybe even some old branches – all that stuff can trap moisture and eventually work its way into places it shouldn’t be. A clear area around the wellhead is your first line of defense.
Here’s a quick rundown of what to do:
- Get rid of any weeds or overgrown plants right up against the well casing.
- Sweep or rake away loose dirt, leaves, and any other organic matter.
- If you have any old equipment or junk lying around near the well, move it. You want a good buffer zone.
Washing Down the Well Casing
Once the area is clear, you can give the well casing itself a good wash. This isn’t about scrubbing it with soap and water like your kitchen sink, but more about rinsing off accumulated grime. You can use a hose with a decent spray nozzle. Start from the top and work your way down. This helps wash away any dust or dirt that’s settled on the casing, and it gives you a better look at the surface.
Importance of Proper Drainage
This is a big one, and it ties into keeping things clean. You really don’t want water pooling around your wellhead. That standing water can seep into cracks, carry contaminants, and generally make life difficult for your well seal. Make sure the ground slopes away from the well. If you notice water tends to collect there after rain, you might need to do some minor grading or even install a small French drain to redirect the flow.
Think about how water behaves. It always finds the lowest point. If the lowest point is right next to your well seal, that’s where problems can start. A little bit of attention to how water moves on your property can save you a lot of headaches down the road. It’s about managing the environment around your well, not just the well itself.
Regular cleaning, even just a quick sweep and rinse a couple of times a year, can prevent bigger issues from popping up. It’s a simple step that contributes a lot to the overall health of your water system.
Preventative Measures for Well Seal Longevity
Taking steps to protect your well seal now can save you a lot of headaches later. Think of it like giving your well a little ongoing TLC. It’s not complicated stuff, mostly common sense, but it makes a big difference in keeping your water clean and your system running right.
Protecting the Wellhead from Physical Damage
The wellhead is the part of your well that sticks out of the ground, and it’s pretty exposed. You want to make sure nothing accidentally bumps into it or puts undue stress on it. This means:
- Keep vehicles and heavy equipment away from the immediate area. A stray mower or a truck backing up can do more damage than you’d think.
- Consider installing protective posts or a low fence around the wellhead if it’s in a high-traffic zone, like near a driveway or a frequently used path.
- Be mindful when doing yard work. Avoid using weed whackers right up against the casing, as the string can wear away at the material over time.
Managing Surface Water Runoff
Water that flows over the ground can carry all sorts of contaminants. You don’t want that water pooling around your wellhead or seeping down the casing. Proper drainage is key to preventing contamination.
- Grade the land around your wellhead so it slopes away. This directs rainwater and snowmelt away from the well.
- Keep gutters and downspouts on nearby buildings clear. Make sure the water from your house or any outbuildings isn’t dumping right next to your well.
- Avoid creating depressions or low spots where water can collect near the well.
Regularly Inspecting Nearby Structures
Sometimes, issues with other parts of your property can indirectly affect your well seal. It’s good to keep an eye on things.
- Check septic systems, especially the drain field, to ensure they are functioning correctly and not leaking.
- Look at any foundations or retaining walls near the well. Shifting or cracking in these could indicate ground movement that might affect the well casing or seal.
- Pay attention to any changes in the landscape, like new erosion patterns, that might suggest water is starting to flow in unwanted directions.
It’s easy to forget about the well once it’s installed, but it’s a vital part of your home’s infrastructure. A little bit of proactive care, like making sure the ground slopes away from the wellhead and keeping heavy equipment at a safe distance, can prevent costly repairs down the road. Think about it – a compromised seal can let all sorts of unwanted stuff into your water supply, and that’s a problem nobody wants. So, a quick walk-around every now and then to check for obvious issues is time well spent.
Addressing Minor Well Seal Issues Yourself
Sometimes, you’ll spot little things wrong with your well seal that don’t seem like a big deal, but it’s good to fix them before they turn into something worse. Taking care of these small problems yourself can save you time and money.
Sealing Small Cracks in Concrete
If you see tiny cracks in the concrete apron around your wellhead, don’t just ignore them. Water can seep into these cracks, freeze and expand in the winter, making them bigger. You can usually fix these with a good quality concrete patching compound or a caulk designed for outdoor concrete.
- Clean the crack: Use a wire brush to get rid of any loose bits or dirt. You want a clean surface for the patch to stick to.
- Apply the patch: Follow the instructions on your patching product. Some you mix, others are ready to go. Push it into the crack firmly.
- Smooth it out: Use a trowel or putty knife to make the patch level with the surrounding concrete.
- Let it cure: Give it enough time to dry and harden completely before it gets wet.
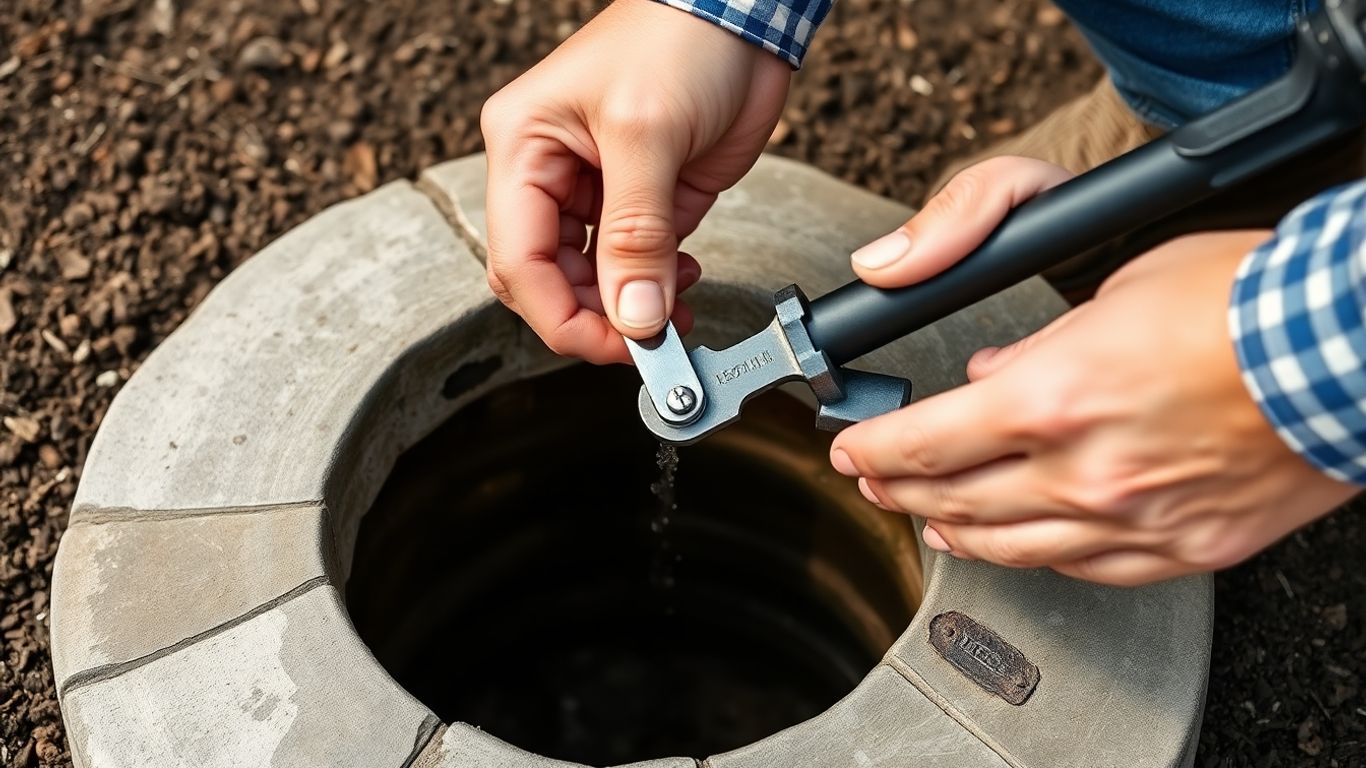
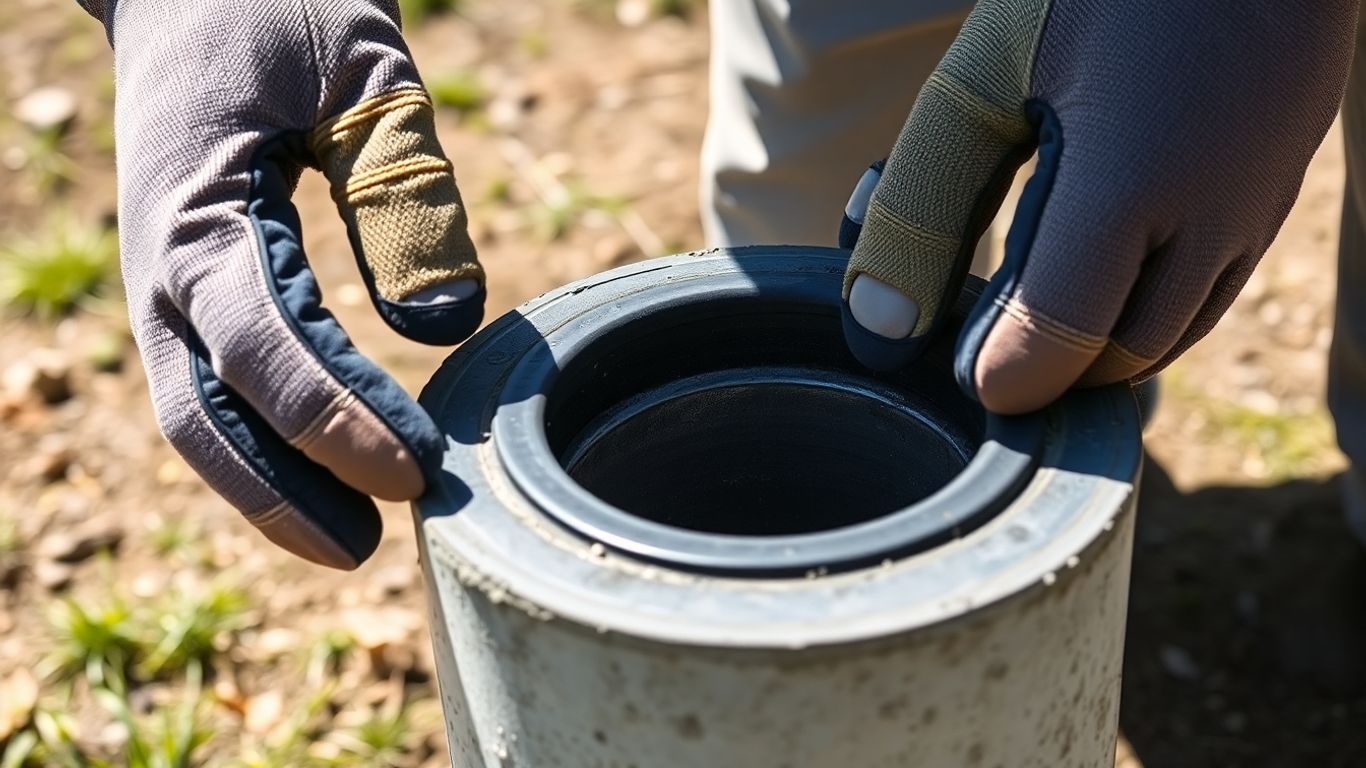
Replacing Damaged Gaskets
Many well seals have rubber gaskets that help keep water and critters out. If these look dried out, cracked, or are missing pieces, they need replacing. This is usually pretty straightforward.
- Identify the gasket: Figure out where the gasket is located – it might be around the well cap or where the casing meets the pitless adapter.
- Get the right size: Measure the old gasket or the space it fits into to buy a replacement that’s the same size and type.
- Remove the old one: Carefully pry out the old, damaged gasket.
- Install the new one: Press the new gasket firmly into place, making sure it sits evenly.
When to Call a Professional
While small fixes are doable, there are times when you really should call in an expert. Trying to do too much yourself could actually cause more damage or create a bigger problem for your water supply.
Don’t attempt repairs that involve the main plumbing, electrical components, or anything that requires specialized tools or knowledge. If you’re unsure about any step, it’s always better to be safe and get professional help. Your water quality and well’s integrity are too important to risk.
- Any damage to the well casing itself.
- If you suspect contamination is entering the well.
- Problems with the pitless adapter or other buried components.
- If you’re dealing with significant structural damage to the wellhead or surrounding concrete.
- Anytime you feel uncomfortable or unsure about the repair.
Seasonal Well Seal Maintenance Checklist
Keeping an eye on your well seal throughout the year is a smart move. Different seasons bring different challenges, and a little proactive care can save you a lot of headaches down the road. Regular checks help prevent bigger problems before they even start.
Spring Inspection and Cleaning
Once the snow melts and things start to dry out, it’s time for a good look-see. Spring is the perfect season to clear away any winter debris and check for damage that might have happened during the colder months.
- Clear the area: Remove any leaves, branches, or other gunk that has piled up around the wellhead. You want a clear view of the seal and casing.
- Wash it down: Use a hose to gently wash down the well casing. This helps remove any dirt or grime that might be clinging to it.
- Check for pooling water: Make sure water isn’t collecting around the wellhead. Poor drainage can lead to water seeping into the seal.
Proper drainage around your wellhead is super important. If water sits there, it can eventually find its way into cracks or weak spots, potentially contaminating your water supply or damaging the seal itself. Think of it like giving your well a little moat, but one that drains away from the house.
Fall Preparation for Winter
Before the first freeze hits, you’ll want to do a quick check to make sure everything is buttoned up for winter. This is mostly about preventing ice damage and making sure the seal is ready for the cold.
- Inspect for new cracks: Look for any new cracks or gaps that might have appeared over the summer.
- Secure the cap: Make sure the well cap is on tight and the vent is clear. You don’t want critters or debris getting in.
- Check insulation (if applicable): If you have any insulation around the wellhead, make sure it’s still in place and hasn’t been disturbed.
Post-Storm Damage Assessment
Big storms, whether it’s heavy rain, high winds, or even a derecho, can sometimes impact your well system. It’s not something you think about every day, but after a significant weather event, a quick check is a good idea.
- Visual check: After a major storm, take a walk around your wellhead. Look for any obvious signs of damage, like a shifted cap, fallen branches on the casing, or unusual debris.
- Listen for odd noises: Sometimes, you might hear strange sounds coming from the well area after a storm, which could indicate something is loose or damaged.
- Water quality check: If you notice anything unusual or have concerns, it’s always a good idea to test your water quality after a significant weather event.
Wrapping Up Your Well Seal Care
So, taking care of your well seal doesn’t have to be a huge headache. A little regular checking and knowing when to call in a pro can save you a lot of trouble down the road. Remember, a healthy well seal means cleaner water for your home, and that’s pretty important. Don’t wait for a problem to pop up; a quick look now and then is way better than a big fix later. If anything seems off, don’t hesitate to get a professional opinion. Your well deserves it, and so do you.
Frequently Asked Questions
What exactly is a well seal and why is it so important?
Think of your well seal as a protective cap for your well’s opening. Its main job is to keep yucky stuff like dirt, bugs, and rainwater from getting into your drinking water. A good seal means safer, cleaner water for your home.
How often should I check my well seal?
It’s a good idea to give your well seal a quick look-over at least twice a year, maybe in the spring and fall. If you live in an area with bad weather, like heavy storms, it’s smart to check it after those events too, just to be safe.
What are some signs that my well seal might be broken or damaged?
Look for obvious things like cracks in the concrete around the well, gaps where the seal meets the pipe, or if the cap seems loose. You might also notice if water is pooling around the wellhead or if your water suddenly tastes or smells funny.
Can I fix a small crack in my well seal myself?
For tiny cracks in the concrete part of the seal, you might be able to patch them up with a special concrete repair caulk. Just make sure it’s waterproof and safe for well use. If the crack is big or you’re unsure, it’s best to get a pro.
What’s the deal with the grout around my well?
The grout is like a cement-like layer that seals the space between the well pipe and the ground. It’s super important for stopping surface water from seeping down into your well. You want to make sure it’s solid and doesn’t have any holes or cracks.
When is it definitely time to call a professional for my well seal?
If you see major cracks, if the well cap is severely damaged, if you suspect contamination, or if you’re just not comfortable doing the work yourself, it’s time to call a well expert. They have the right tools and know-how to fix it properly and keep your water safe.